Get started with SimboDIYAS: Step by Step Registration
Get started with SimboDIYAS
What SimboDIYAS does
SimboDIYAS is an AI powered answering service for medical practices. It helps screen patients, handle after-hours and overflow calls, and route messages to the correct on-call team. You can manage schedules, alerts, and message templates from an admin dashboard.
Website: https://diyas.simboconnect.com
Before you start
-
Use a work email that you can access.
-
Have your practice name and address ready.
-
Have a payment method ready. Card and Cash App Pay are available on checkout.
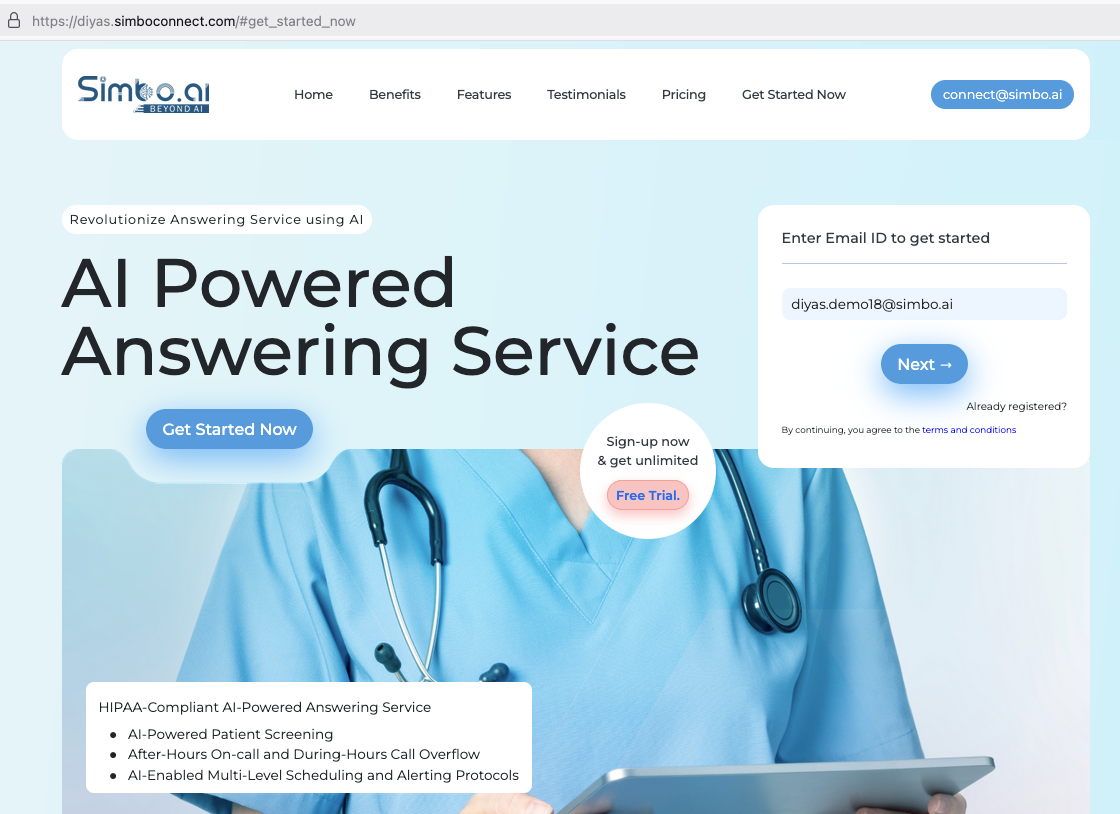
Step 1. Enter your email to begin
-
Go to the SimboDIYAS website.
-
Enter your work email in the “Enter Email ID to get started” field on the right.
-
Press Next.
Snapshot:
Step 2. Create your administrator account
-
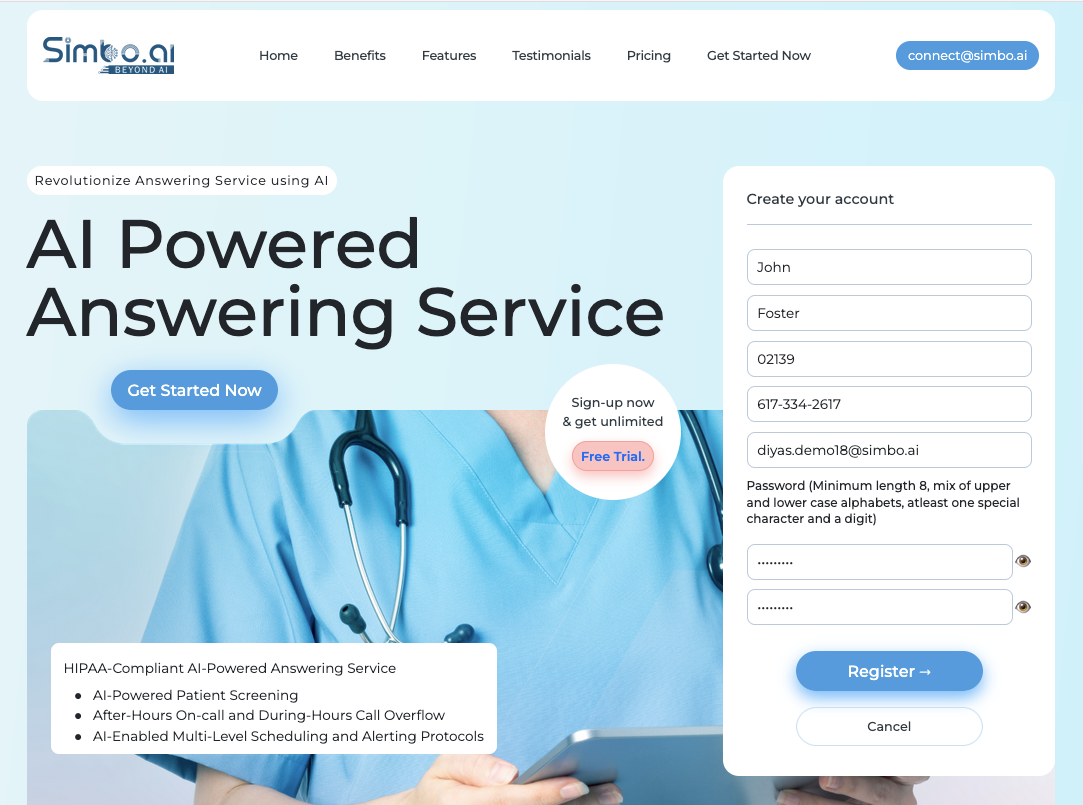
Enter First Name and Last Name.
-
Enter Zip Code and Phone number (xxx-xxx-xxxx).
- The phone number specified preferably be a cell phone which helps sending some critical alerts, if required.
-
Confirm your Email is correct.
-
Create a Password. Minimum length 8, use upper and lower case letters, at least one special character, and a digit.
-
Re-enter the same password.
-
Press Register.
Snapshot:
Step 3. Choose a subscription plan
-
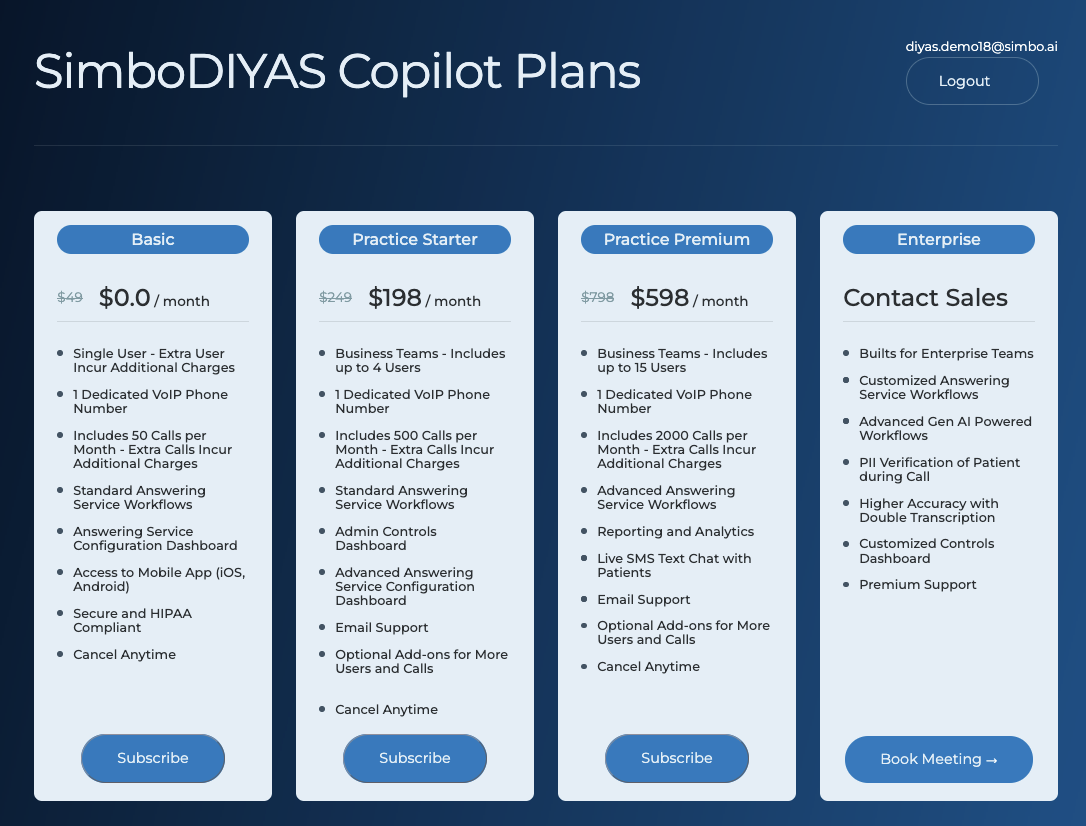
Review the available plans. You can pick Basic, Practice Starter, or Practice Premium.
-
Each plan includes a dedicated VoIP phone number and answering workflows. Higher tiers include more calls and extra features.
-
Press Subscribe under the plan that fits your practice.
Snapshot:
Step 4. Enter payment information
-
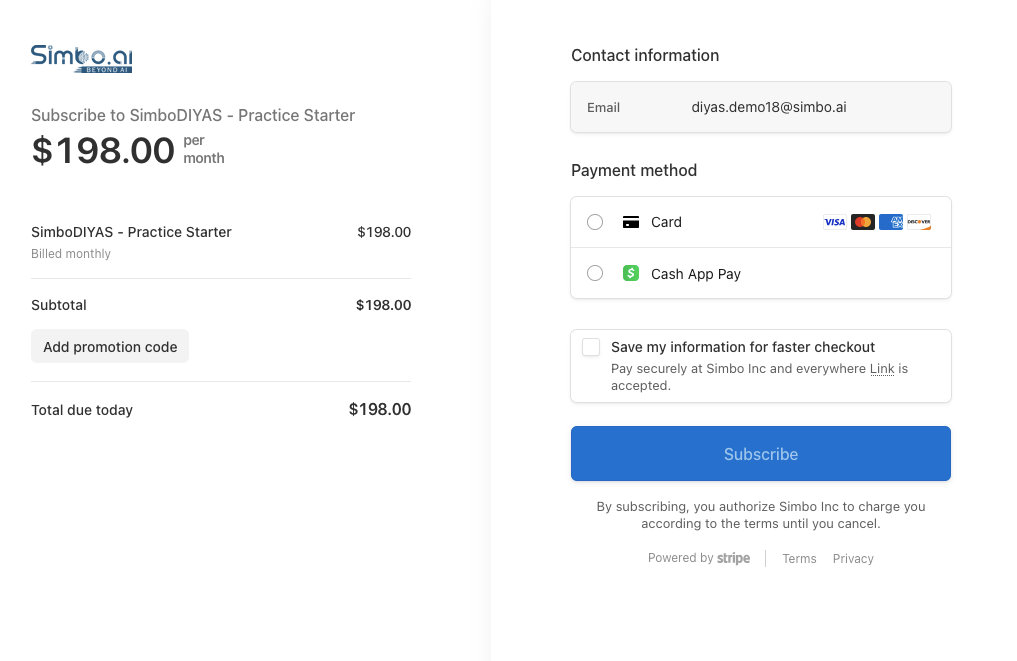
On the secure checkout page, confirm your Email.
-
Choose Card or Cash App Pay as your payment method.
-
If you have a promo code, select Add promotion code and apply it.
-
Select Subscribe to complete payment.
Snapshot:
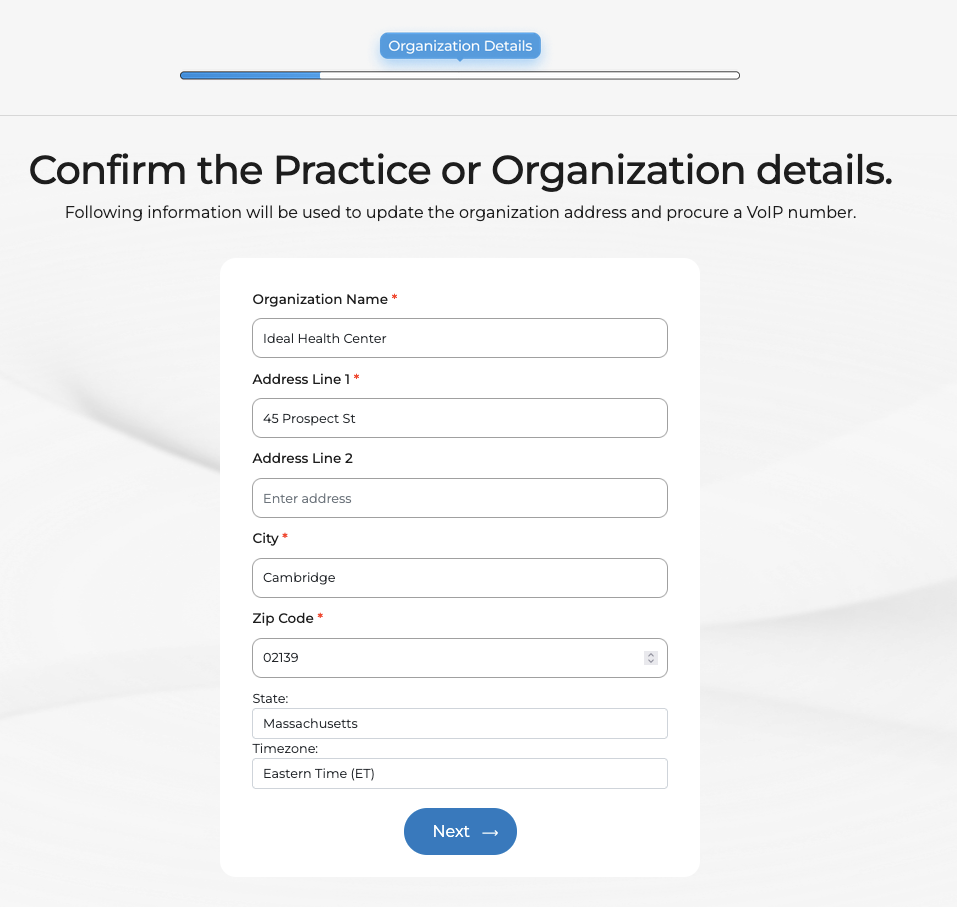
Step 5. Enter practice details
-
Type your Organization Name.
-
Enter Address Line 1, optional Address Line 2, City, and Zip Code.
-
Confirm State and Timezone.
-
Press Next.
Snapshot:
Step 6. Follow the on-boarding screen
-
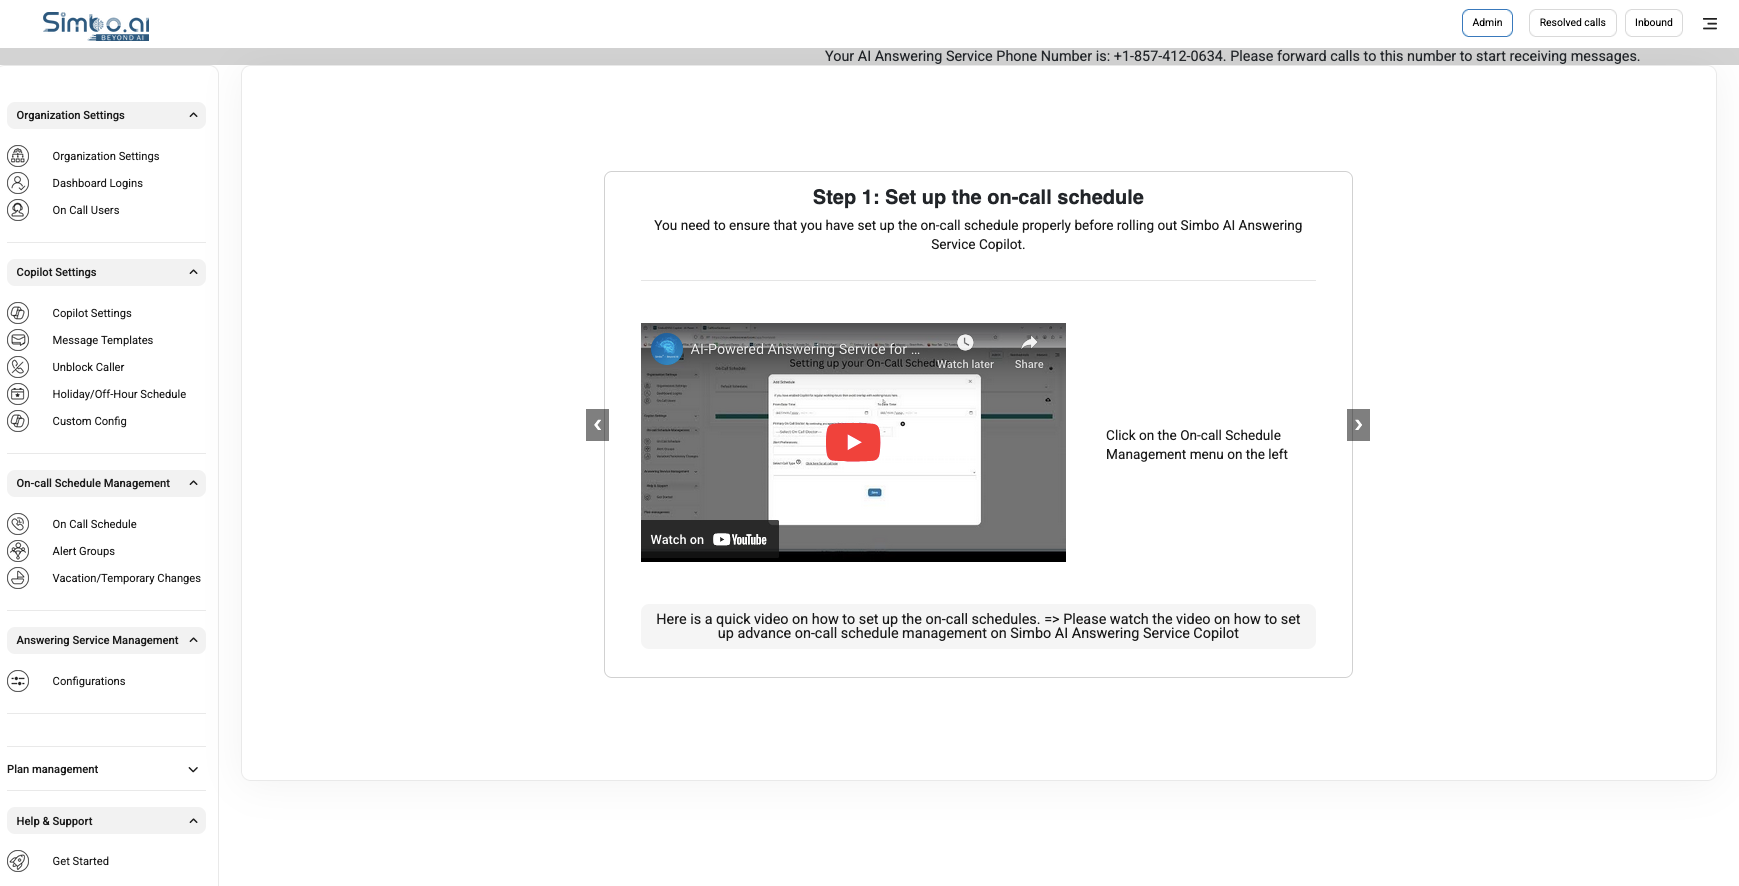
You will land in the admin dashboard with a setup guide.
-
At the top you will see your dedicated AI Answering Service phone number. Forward your practice calls to this number to start receiving messages.
-
Use On Call Schedule and Alert Groups to set coverage and routing.
-
Review Copilot Settings and Message Templates to customize call handling.
Snapshot:
Step 7. Rolling out the AI Answering Service
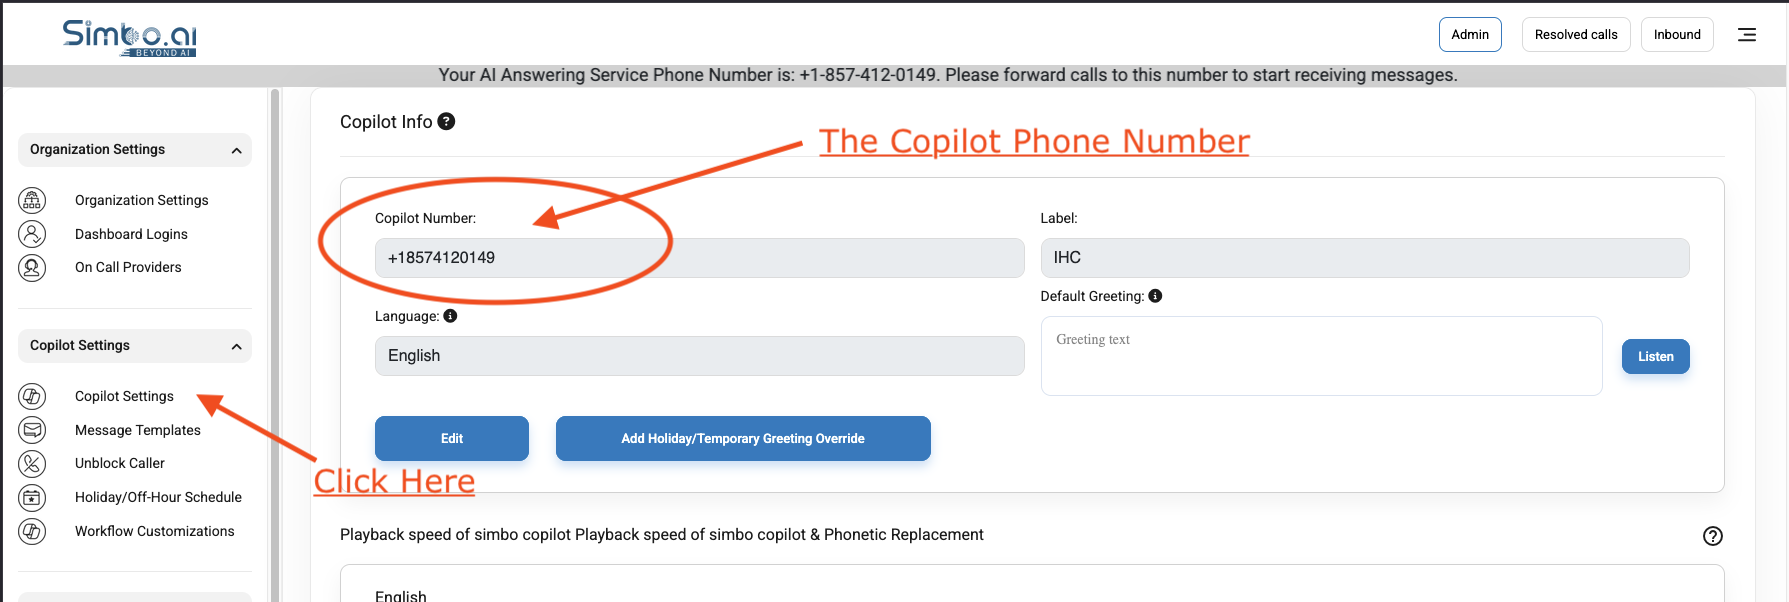
- Go to Admin -> Copilot Settings and check the "Copilot Number" for the dedicated Copilot Phone Number for your practice.
- Forward your phone calls from your Phone System to this Copilot Phone Number and you are all set!
- Feel free to make some calls to the Copilot Phone Number to check out how it works.
- But before you do that, ensure that you have setup your workflows properly! Details with links given below.
Step 8. On-boarding and workflow configurations
Please see the links below for details on how to configure your Copilot for best performance and your custom workflows. You can update those on your login and press the "Admin" on top-menu.
-
You can checkout complete guide on this page: https://api1.simboconnect.com/helpb/books/simbodiyas-after-hours-on-call-ai-agent
- Customize your workflows: https://api1.simboconnect.com/helpb/search?term=SimboDIYAS+Workflow+Customizations
-
In case you turned on the after-hours on-call workflows, please setup on-call schedule here: https://api1.simboconnect.com/helpb/search?term=on-call
- Add new dashboard logins: https://api1.simboconnect.com/helpb/books/simbodiyas-after-hours-on-call-ai-agent/page/add-a-new-dashboard-user-admin-panel
What happens next
-
Your subscription becomes active after payment.
-
You can finish any remaining on-boarding steps above on your Admin Panel.
-
Keep the admin login safe. You can add team members later from the admin area.
Need help
Email connect-support@simbo.ai from your work email and include your practice name.