SimboDIYAS - After-hours On-call AI Agent
- SimboDIYAS Workflow Customization: Configure the On-call Answering Service - Admin Panel
- SimboDIYAS Workflow Customization: Enable During Hours Smart Answering Service - Admin Panel
- SimboDIYAS Workflow Customization: Enable Hospital Answering Service and Add Hospitals - Admin Panel
- SimboDIYAS Workflow Customization: Enable Smart Bifurcation of Calls from ER and Floors - Admin Panel
- SimboDIYAS Workflow Customization: Enable Smart Bifurcation by Hospital Name - Admin Panel
- SimboDIYAS Workflow Customization: Announce Available Doctors and Let Callers Choose a Doctor - Admin Panel
- SimboDIYAS Workflow Customization: Manage the Doctor List for Announcements - Admin Panel
- SimboDIYAS Workflow Customization: Test and Validate Answering Service Changes - Admin Panel
- SimboDIYAS Workflow Customization: Best practices for Hospital Short Codes - Admin Panel
- Reset your password
- How to open Organization Settings - Admin Panel
- How to update Organization Information
- How to set business hours and spoken office hours
- Get to know the Inbound dashboard
- Create your own persistent dashboards (Favorites)
- Use shortcut dashboards (preset filters)
- Search calls Or SMS interactions
- Filter calls (Type, Language, Status, Copilot, Intent
- Work with grouped call threads (by phone number)
- Place an outbound call from the dialer (HIPAA‑compliant)
- Send a HIPAA‑compliant chat message from the calls workflist dashboard (home screen)
- Refresh, collapse, and paginate on Inbound calls worklist
- Column quick reference for calls worklist dashboard
- Icon guide on main home screen (call worklist dashboard)
- SimboDIYAS — Home Screen All Calls Worklist Dashboard
- Call Details screen overview (single-page guide)
- Navigate the Call Details screen
- View caller history and past SMS
- Play a specific audio part of the call
- Listen to the full call recording
- Read the AI Summary and request blocks
- Send and receive SMS text chat
- Use Write with AI and Templates in SMS
- Call back a patient from the dashboard
- Block a spam or bot caller
- Assign a call to a teammate and notify them
- Set the call status
- Leave Staff Comments for your team
- Copy patient data with one click into your EHR
- Set Phone Number and Date of Birth Formats for EHR Copy Paste
- View the Audit Trail
- Give quick feedback on the AI
- Use More Info for call metadata
- Verify patient identity and details
- Confirm what Copilot already resolved
- Download and use patient images from SMS
- Take ownership with "I am Working on it"
- Copy from transcript and share exact wording
- Language handling in SimboDIYAS
- Manage SMS Text Chat With Patients in SimboDIYAS
- View Resolved Calls in SimboDIYAS
- Custom AI Agents in SimboDIYAS: Overview and Use Cases
- Create Custom Letters with Voice
- Work with SimboGPT (HIPAA Compliant AI Chat)
- AI Language Translator at the Front Desk
- AI Agent Translator on a Phone Call
- Enable or Create a Custom AI Agent
- Manage Dashboard Logins: Page Overview and Quick Actions - Admin Panel
- Add a New Dashboard User - Admin Panel
- Edit an Existing Dashboard User - Admin Panel
- Reset a User Password - Admin Panel
- Delete a Dashboard User - Admin Panel
- Search and Filter Dashboard Users - Admin Panel
- Access and understand the On Call Providers page - Admin Panel
- Add a new On Call Provider - Admin Panel
- Edit an existing On Call Provider - Admin Panel
- Delete an On Call Provider safely - Admin Panel
- Search, filter, and switch organizations on the On Call Providers page - Admin Panel
- Copilot Settings page in SimboDIYAS
- Change the Copilot label
- Set or update the Default Greeting - Admin Panel
- Add a Holiday or Temporary Greeting Override - Admin Panel
- How greeting priority works - Admin Panel
- Input Forms Label Reference for Copilot Settings - Admin Panel
- Troubleshooting greeting changes - Admin Panel
- Message Templates in SimboDIYAS: Overview - Admin Panel
- Viewing and Searching Message Templates - Admin Panel
- Creating a New Message Template - Admin Panel
- Editing an Existing Message Template - Admin Panel
- Deleting a Message Template - Admin Panel
- Using Placeholders in Message Templates - Admin Panel
- Selecting Specific Organization Settings across the Admin Panel
- Unblock Callers - Admin Panel
- Manage Holidays and Unplanned Off-Hours - Admin Panel
- Import and Export Holiday Schedules with Excel - Admin Panel
- On-Call Scheduling Overview - Admin Panel
- Switch Between Calendar and Table Views - Admin Panel
- Adding On-Call Schedule - Admin Panel
- Edit or Delete an On-Call Schedule Entry - Admin panel
- Configure the Fallback On-call Schedule - Admin Panel
- Create a Recurring On-call Schedule - Admin Panel
- Choosing Call Types for On-call Schedule - Admin Panel
- Set Alert Preferences (Alert Group) on a On-call Schedule - Admin Panel
- Import and Export On-call Schedules with Excel - Admin Panel
- Verify On-call Coverage Using Calendar and Table View - Admin Panel
- Alert Groups in SimboDIYAS: Overview - Admin Panel
- Create or Edit an Alert Group for After-Hours On-Call Alerts - Admin Panel
- Understanding Vacation and Temporary Overrides - Admin Panel
- Manage Vacation and Temporary Overrides: Add, Edit, Delete, and View - Admin Panel
- Access Analytics in SimboDIYAS - Admin Panel
- Call Volume Report: Overview - Admin Panel
- Call Volume: Weekday Averages - Admin Panel
- Call Volume: Hourly Averages - Admin Panel
- Call Volume: Daily Call Volume - Admin Panel
- Call Details Report: Overview - Admin Panel
- Call Details: Call Bifurcation - Admin Panel
- Call Details: Call Assignments - Admin Panel
- Call Details: Call Closure Time / SLA - Admin Panel
- Call Details: Call Closed By (Call Closers) - Admin Panel
- Customer Journey Report: Overview - Admin Panel
- Customer Journey: Transfers, Pickup, Missed Calls, and Handle Time - Admin Panel
- Analytics Glossary - Admin Panel
- Operational Playbook: Turning Analytics Into Action - Admin Panel
- User Roles Dashboard
- Get started with SimboDIYAS: Step by Step Registration
SimboDIYAS Workflow Customization: Configure the On-call Answering Service - Admin Panel
Purpose
This article explains the full configuration of the On-call Answering Service in SimboConnect so that you can adjust AFRA workflows for your practice.
Where to go
-
Open Admin.
-
Go to Answering Service Management.
-
Select Configurations.
-
Click Edit.
What you can configure
-
During Hours Smart Answering Service
Let the AI Phone Copilot take calls during working hours, capture messages, and place them on the dashboard.
-
Hospital Answering Service
Route calls from hospital staff. Add hospital names and short codes.
-
Smart bifurcation from ER and Floors
Ask callers from a hospital to specify if they are calling from the ER or a floor and route accordingly.
-
Smart bifurcation by hospital name
Ask the caller which hospital they are calling from and route by the selected hospital.
-
Announce available doctors (Own Calls Providers)
Let callers choose a specific on-call doctor for Routine, Stat, or Office Urgent requests.
-
Doctor List
Add doctor names and contact details that the system will announce when enabled.
-
Save or Cancel
Save changes to apply them to live workflows.
Detailed behavior
-
When During Hours Smart Answering Service is enabled, the Copilot answers during your defined business hours, records the message with context, and posts it to the dashboard for staff follow-up.
-
When Hospital Answering Service is enabled, you can add one or more hospitals. Each has a short code for quick tagging. Short codes should be short and easy to remember.
-
If you enable ER and Floors bifurcation, the Copilot will ask where the caller is located and will route or tag the call by ER or Floor.
-
If you enable bifurcation by hospital name, the Copilot will confirm the hospital name with the caller and route or tag the call by the hospital.
-
If you enable Own Calls Providers, the Copilot will announce available on-call doctors and let the caller select a doctor. You can enable this for Routine, Stat, and Office Urgent scenarios.
Tips and good practices
-
Make one change at a time, save, and then place a quick test call to confirm the behavior.
-
Keep hospital short codes very short and unique.
-
Enable bifurcation only when the extra routing will help your team act faster.
-
Review the doctor list frequently to keep coverage current.
-
Document your business hours and escalation rules inside your internal playbook so staff understands how the Copilot is configured.
SimboDIYAS Workflow Customization: Enable During Hours Smart Answering Service - Admin Panel
Purpose
Turn on smart call handling during working hours so messages flow to the dashboard instead of personal voicemail.
Steps
-
Open Admin → Answering Service Management → Configurations → Edit.
-
Check Enable During Hours Smart Answering Service.
-
Click Save.
What happens after enabling
-
The Copilot will answer calls during your set business hours.
-
The Copilot will collect caller intent and message.
-
A structured message will appear on the dashboard for staff review and action.
Tips and good practices
-
Make sure your business hours are accurate in your organization settings.
-
Train staff to check the dashboard at the start and end of each shift.
-
Use concise voicemail greetings so callers reach the Copilot quickly.
SimboDIYAS Workflow Customization: Enable Hospital Answering Service and Add Hospitals - Admin Panel
Purpose
Accept and manage calls from hospital staff for routine and urgent consults.
Steps
-
Open Admin → Answering Service Management → Configurations → Edit.
-
Check Enable Hospital Answering Service.
-
In Hospital Name, enter each hospital you support.
-
For each hospital, enter a short Code. Keep it short and unique.
-
Click Save.
What happens after enabling
-
Calls identified as hospital calls are handled using the hospital workflow.
-
Messages are tagged with the hospital and short code.
-
You can add routing rules later using bifurcation options.
Tips and good practices
-
Use 2 to 3 character short codes that staff already uses in daily work.
-
Add only active hospitals to avoid confusion.
-
Review call logs weekly to verify correct tagging.
SimboDIYAS Workflow Customization: Enable Smart Bifurcation of Calls from ER and Floors - Admin Panel
Purpose
Ask hospital callers to specify ER or Floor so messages reach the right on-call flow.
Prerequisite
Hospital Answering Service must be enabled.
Steps
-
Open Admin → Answering Service Management → Configurations → Edit.
-
Check Enable smart bifurcation of calls from ER and Floors from hospitals.
-
Click Save.
What happens after enabling
-
The Copilot will ask the caller whether they are calling from the ER or a specific floor.
-
The system will route or tag the call based on the selection.
Tips and good practices
-
Enable this only if ER and Floor calls need different routing or urgency.
-
Share the new flow with hospital units so they know what to expect.
-
Monitor the first week of calls to confirm accurate caller selections.
SimboDIYAS Workflow Customization: Enable Smart Bifurcation by Hospital Name - Admin Panel
Purpose
Ask callers to select the hospital they are calling from and route based on that choice.
Prerequisite
Hospital Answering Service must be enabled and hospitals must be added.
Steps
-
Open Admin → Answering Service Management → Configurations → Edit.
-
Check Enable smart bifurcation of calls from different hospital names.
-
Click Save.
What happens after enabling
-
The Copilot will announce the hospital options and confirm the selection with the caller.
-
Calls and messages will carry the chosen hospital tag for reporting and routing.
Tips and good practices
-
Keep the hospital list short and relevant to reduce caller wait time.
-
Use clear, distinct hospital names to avoid confusion during selection.
-
Review analytics to see which hospitals generate the most calls and adjust staffing.
SimboDIYAS Workflow Customization: Announce Available Doctors and Let Callers Choose a Doctor - Admin Panel
Purpose
Allow callers to route to a specific on-call doctor when appropriate.
Steps
-
Open Admin → Answering Service Management → Configurations → Edit.
-
To enable announcements for a scenario, check one or more of:
-
Enable Own Calls Providers For Hospital Routine
-
Enable Own Calls Providers For Hospital Stat
-
Enable Own Calls Providers For Office Urgent
-
-
Ensure the Doctor List contains the doctors who can receive calls.
-
Click Save.
What happens after enabling
-
The Copilot will announce available doctors for the selected scenario.
-
Callers can press a number to choose a doctor.
-
Messages and live transfers will reflect the chosen doctor.
Tips and good practices
-
Enable announcements only for scenarios where a direct doctor choice is useful.
-
Keep the doctor list current to avoid failed transfers.
-
Use rotation rules in your on-call schedule to decide who appears in announcements.
SimboDIYAS Workflow Customization: Manage the Doctor List for Announcements - Admin Panel
Purpose
Add and maintain the doctors that the Copilot can announce or route to.
Steps
-
Open Admin → Answering Service Management → Configurations → Edit.
-
When you enable any of the "doctors taking their own calls" -> In Doctor List, enter the following for each doctor:
-
First name
-
Last name
-
Email
-
Phone number
-
-
Use the add button to include additional doctors or the remove button to delete one.
-
Click Save.
Notes
-
The list powers the Own Calls Providers announcements.
-
Only include doctors who are available to take calls according to your on-call policy.
Tips and good practices
-
Review and update the list before each new on-call rotation.
-
Verify phone numbers and escalation preferences with each doctor.
-
Remove inactive doctors to keep menus short for callers.
SimboDIYAS Workflow Customization: Test and Validate Answering Service Changes - Admin Panel
Purpose
Confirm that your configuration changes produce the workflow you expect.
Steps
-
After saving any change, place a test call from an external phone line.
-
Walk through the expected path:
-
During hours message capture
-
Hospital selection
-
ER or Floor choice
-
Hospital name choice
-
Doctor announcement and selection
-
-
Check the dashboard for the created message and tags.
-
If routing to a doctor was expected, confirm that the call or notification reached the correct person.
Troubleshooting checklist
Tips and good practices
-
Keep a simple test script so every admin can perform the same checks.
-
Test each scenario after you change schedules or doctor availability.
-
Review recent messages daily for the first week after any major change.
SimboDIYAS Workflow Customization: Best practices for Hospital Short Codes - Admin Panel
Purpose
Create clear and useful short codes for hospitals to improve speed and accuracy.
Guidelines
-
Use 2 to 3 characters only.
-
Make each code unique across all hospitals.
-
Match common abbreviations your team already uses.
-
Avoid numbers that can sound similar on a phone call.
How to update
-
Open Admin → Answering Service Management → Configurations → Edit.
-
Update the Code field next to each hospital.
-
Click Save and test a hospital call to see the new tags in the dashboard.
Tips and good practices
Reset your password
Phone Copilot: Forgot and Reset Password
This article explains how users can recover access to phone Copilot when they forget their password, and how they can set a new password safely.
What this feature does
-
Lets a user request a password reset link by entering the email that is linked to the account.
-
Sends a one time link to that email so the user can create a new password.
-
Protects privacy by not saying if an email exists in our system.
Forgot Password
-
Go to Forgot Password from the sign in screen.
-
Enter your email address and select Send reset link.
-
If that email is in our system, you will receive an email with a reset link.
-
The page will show: If the address is in our system, we have sent a reset link.
Notes
-
The reset link expires after a short time. The default is 15 to 60 minutes.
-
If you try many times, you may see a rate limit message. Please try again later.
-
Check spam or junk folders if you do not see the email.
Reset Password
-
Open the email on a trusted device and select the Reset password link.
-
A secure page will open in your browser.
-
Enter a new password and confirm it.
-
Select Reset password to finish.
-
You will see Your password has been updated and a link to sign in.
Password tips
-
Use at least 8 to 12 characters.
-
Include a mix of letters and numbers.
-
Avoid names, common words, or old passwords.
If the link does not work
-
If the page says This link is invalid or has expired, request a new link from Forgot Password.
-
If you cannot access the email account, contact Support so we can help verify your identity.
Security and privacy
-
For safety, we do not confirm whether an email exists in phone Copilot.
-
The reset link can be used one time only and then becomes invalid.
-
After a successful reset, recent sessions may be signed out for your security.
I did not request a reset
-
If you receive a reset email that you did not request, you can ignore it. Your password will not change unless someone uses the link.
-
For extra safety, sign in and change your password, and turn on multi factor authentication if your account supports it.
Getting help
If you need help at any point, contact Phone Copilot Support at support-connect@simbo.ai or from the Help menu inside the app.
Last updated: 16 September 2025
How to open Organization Settings - Admin Panel
What this covers: Getting to the correct page and understanding the layout.
Steps
-
Sign in to Phone Copilot.
-
In the top navigation, select Admin.
-
In the left sidebar, under Organization Settings, click Organization Settings.
-
You will see two main areas on this page:
-
Organization Information at the top.
This is where you set your organization name, spoken labels, address, country, timezone, and security.
-
Specify working hours of the organization below.
This is where you set business days, common start and end times, and custom time slots for each day.
-
What you will see on this page
-
A selector at the very top called Select Organization.
-
Fields such as Organization Name, Organization Short Label, Organization Long Label (Spoken), Address, City, State, Zipcode, Country, Timezone, and Fax number.
-
A checkbox to Enable Two Factor Authentication.
-
Two text boxes named Office Address (Spoken) and Office Hours (Spoken) with a Write with AI button.
-
A Specify working hours of the organization section with:
-
Common Start Time and Common End Time.
-
Day checkboxes for Monday to Sunday.
-
Per-day rows labeled Monday Custom Times, Tuesday Custom Times, and so on. Each row has Start Time, End Time, Remove, and + Add Custom Time Slot.
-
Tip: If you see an Edit button at the bottom, click it to switch into edit mode before making changes. After you finish, click Save if it appears.
How to update Organization Information
What this covers: Profile details, spoken labels, address, timezone, and security.
Steps
-
Go to Admin → Organization Settings.
-
If needed, click Edit.
-
In Organization Information, complete or update these fields:
-
Organization Short Label. A short code or label that appears in parts of the product. Example: IHC.
-
Organization Long Label (Spoken). A clear name used by the voice agent when speaking to callers. Example: Ideal Health Center.
-
Fax number. Fill this if your office uses fax.
- Note: The following fields are non-editable and cannot be updated here:
-
Organization Name, Address, City, State, Zipcode, Country, Timezone
-
-
-
(Optional) Turn on security:
-
Check Enable Two Factor Authentication if you want users to sign in with a second step for better security.
-
-
In Office Address (Spoken), enter a simple, caller-friendly address. Example:
Simbo INC, 31 Street, Boston, US
-
Click Save if the button is shown.
Tips and good practice
-
Keep the Long Label (Spoken) easy to pronounce. This improves call clarity.
-
Match the Timezone to your actual office hours to avoid after-hours call routing mistakes.
-
Use standard postal formatting for Address and Zipcode to help downstream integrations.
How to set business hours and spoken office hours
What this covers: Working days, common hours, custom time slots, and the spoken message read to callers.
Steps to set your working hours
-
Go to Admin → Organization Settings and scroll to Specify working hours of the organization and click → edit.
-
Choose your Common Start Time and Common End Time.
-
Example: 9:00 AM to 5:00 PM.
-
If you are open 24 hours, set 12:00 AM to 11:59 PM.
-
-
Select your working days by checking the boxes for Monday through Sunday as needed.
-
If a specific day has different hours, use Custom Times:
-
Find the day row, for example Monday Custom Times.
-
Click + Add Custom Time Slot.
-
Enter Start Time and End Time for that slot.
-
Repeat to add more slots for lunch breaks or split shifts.
Example: 8:00 AM–12:00 PM and 1:00 PM–5:00 PM.
-
Use Remove to delete a slot.
-
-
When all days look correct, click Save if the button is shown.
Steps to write your spoken office hours
-
In Organization Information, find Office Hours (Spoken).
-
Type a friendly sentence that matches the hours you set.
Example: We are open Monday to Friday from 8:00 AM to 5:00 PM. On Saturday we are open from 9:00 AM to 1:00 PM.
-
You can click Write with AI to generate a draft, then edit the text to match your policy.
-
Click Save if the button is shown.
Examples
-
Single schedule, weekdays only
-
Working days: Monday to Friday
-
Common hours: 9:00 AM–5:00 PM
-
Spoken text: We are open Monday to Friday from 9:00 AM to 5:00 PM.
-
-
Split shift on Tuesday
-
Common hours: 8:00 AM–5:00 PM
-
Tuesday Custom Times: 8:00 AM–12:00 PM and 1:00 PM–5:00 PM
-
Spoken text: We are open Monday to Friday from 8:00 AM to 5:00 PM. On Tuesday we are closed from 12:00 PM to 1:00 PM.
-
Troubleshooting
-
If callers hear the wrong time, check that the Timezone is correct.
-
If a day should be closed, either uncheck that day.
-
Avoid overlapping custom slots on the same day. Overlaps can cause routing confusion.
Get to know the Inbound dashboard
Purpose: Understand what you’re seeing and how calls are organized.
What you see
-
Toolbar (top‑right):
-
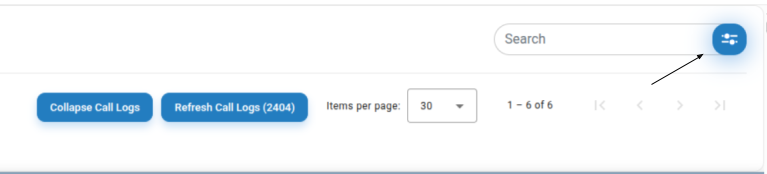
Search box
-
Filter (blue circle with sliders)
-
Collapse Call Logs / Refresh Call Logs
-
Items per page picker
-
-
Tabs/shortcuts (top‑left): ALL, All‑ES, Appointments, Refill, Veronica (preset filters).
-
Call table columns:
-
Phone No. — the caller’s number; rows are grouped by phone number so related calls stay together.
-
Copilot — which AI/line handled the call (e.g., DEMO Line Integrated).
-
Primary Reason — AI‑detected intent (e.g., Request – Need Appointment, Need Refill).
-
Interaction Time — when the call happened.
-
Duration (MM:SS) — call length.
-
Assigned To — owner(s) (if any). If an owner’s name appears in green, it indicates that that owner is actively working on the item.
-
Status — Open or In‑progress.
-
-
Type & language icons (far‑left): phone or message icon + language badge (e.g., EN).
-
Floating actions (bottom‑right): blue phone (dialer) and blue chat (HIPAA‑compliant messaging).
Tips
-
Rows within the same phone number block are related; work them as a thread.
-
Use Refresh Call Logs to load recent activity without leaving the page.
Create your own persistent dashboards (Favorites)
Purpose: Save any filter combination so you can return to it with one click.
Steps
-
Open the Filter panel (blue circle with sliders) .

-
Configure your criteria (Type, Language, Status, Copilot, Intent).
-
In the Favorites section of the panel, choose Add/Save current filters (wording may show as Save, +, or Add to Favorites).
-
Name your favorite (e.g., “Appointments – EN – Open”).
-
Save. Your new favorite appears in the Favorites list (alongside examples like All‑es, Appointments, Refill, Veronica).
-
To use it later, open the Filter panel and tick the favorite’s checkbox.
-
To remove a favorite, click the red delete icon next to it.
Tips and good practices
Teams often make favorites for each queue they work (e.g., Refill – In‑progress, Order Status – Spanish).
Use shortcut dashboards (preset filters)
Purpose: Jump to common call categories with one click.
Steps
-
On the Inbound page, click a shortcut: Like All, All‑ES, Appointments, Refill, or Orders.
-
The table updates to show only matching calls. For example, Appointments shows calls with “appointment” intents.
-
Use Items per page to adjust how many calls you see at once.
These shortcuts are just filters saved by the user only for quick access. You can also make your own (see Create Your Own Persistent Dashboard Favorites).
Search calls Or SMS interactions
Purpose: Find a specific caller or reason fast.
Steps
-
Click into Search (top‑right).
-
Type any of the following:
-
Phone number (full or partial): e.g.
617-334-2317 -
Primary reason keyword:
refill,appointment,billing -
Assignee name (if your org uses assignment)
-
-
Press Enter. Combine with filters for best results (see Create your own filters).
Filter calls (Type, Language, Status, Copilot, Intent
Purpose: Narrow the list to exactly what you need.
Steps
-
Click the Filter button (blue circle with sliders) near the Search box.
-
In the Filter panel, set any of the following:
-
Type: Call or Msg
-
Language: English, Spanish
-
Status: Open, In‑progress
-
Copilot: choose one or more lines (e.g., DEMO Line Integrated, AI Routing)
-
IVR Selection → Intent: check one or more intents (e.g., New Appointment, Refill, Message for Office, Order Status, Urgent, STAT, etc.)
-
-
Apply the filter (the table updates). Use Reset in the panel to clear selections.
Tips and good practices
Combine Language = Spanish with the Intent you care about to staff bilingual agents efficiently.
Work with grouped call threads (by phone number)
Purpose: Handle multiple interactions from the same person as a single workflow.
Steps
-
Calls are grouped by the caller’s phone number in the table. All entries inside a group typically belong to the same patient or task.
-
Start with the oldest unresolved row in a group and work upward.
-
Use Primary Reason and Duration to triage; brief failed attempts (e.g.,
00:04) may indicate a callback is needed.
Tip and good practice
When you complete a task for a group, move/assign the open item to the right owner and update disposition (per your clinic process).
Place an outbound call from the dialer (HIPAA‑compliant)
Purpose: Call a patient or a third party directly from SimboConnect.
Steps
-
Click the floating phone button (bottom‑right).
-
The dial pad opens.
-
Type or paste a number, or click the keypad.
-
Press the green call button to start the call.
-
When finished, end the call. The interaction is logged on the dashboard.
Notes
-
Calls placed from SimboConnect are HIPAA‑compliant.
-
Use the notes/message field in the dialer (above the keypad) when your workflow requires a quick annotation.
Send a HIPAA‑compliant chat message from the calls workflist dashboard (home screen)
Purpose: Coordinate with your team without leaving the dashboard.
Steps
-
Click the floating chat button (bottom‑right).
-
Select the recipient or channel per your clinic setup.
-
Send your message. Chat runs in a secure, HIPAA‑compliant channel.
Tip and good practices
Use chat to hand off a call thread or to request an internal callback.
Refresh, collapse, and paginate on Inbound calls worklist
Purpose: Control how much you see and keep the list fresh.
-
Refresh Call Logs: pulls in the latest items without navigating away.
-
Collapse Call Logs: temporarily hides expanded details so you can scan quickly.
-
Items per page: choose how many rows you want to view at once (e.g., 30).
Column quick reference for calls worklist dashboard
-
Phone No. — Caller’s number. Groups indicate related interactions.
-
Copilot — AI line or integration that answered/handled the call.
-
Primary Reason — Detected intent (e.g., Need Appointment, Need Refill, Order Status).
-
Interaction Time — Local time of the call.
-
Duration (MM:SS) — Call length.
-
Assigned To — Owner of the follow‑up (if used by your clinic). If an owner’s name appears in green, it indicates that that owner is actively working on the item
-
Status — Open or In‑progress.
Icon guide on main home screen (call worklist dashboard)
-
☎︎ / phone icon — Voice call entry.
-
💬 / message icon — Message entry.
-
EN / ES badge — Language detected/selected.
-
Blue phone (bottom‑right) — Open the dialer (outbound call).
-
Blue chat bubble (bottom‑right) — Open secure chat.
-
Blue sliders (near Search) — Open the Filter panel.
Best practices
-
Save the views you use daily as Favorites (one per agent role).
-
Pair Intent with Language to create clean work queues.
-
Refresh often during peak hours; unresolved calls with short durations are strong callback candidates.
SimboDIYAS — Home Screen All Calls Worklist Dashboard
This guide turns your video walkthrough into structured help content your customers can use. It covers how to open the All Calls dashboard, understand what you see, filter/search, create persistent dashboards, manage tasks, and take actions on calls.
1) Overview: What the All Calls dashboard shows
The All Calls dashboard is your real‑time work queue. It:
-
Lists all inbound and outbound calls, grouped by phone number so related calls stay together.
-
Surfaces the primary reason for each call (e.g., Appointments, Refill) alongside other metadata like status and language.
-
Lets you search and filter the list, then save those filters as persistent dashboards (shown as top shortcut chips such as Appointments, Refill, or a teammate’s name like Veronica).
-
Enables inline actions: open the call, update status, create/complete tasks, assign, and more.
Why grouping matters: Multiple calls from the same number are often related to the same person and task. Grouping helps you work the full context without losing history.
2) Open the All Calls dashboard from the main screen
Follow the same entry path shown at the start of the video:
-
From the Phone Copilot home screen, open the left navigation.
-
Select Calls (or Dashboard, depending on your layout).
-
Choose All Calls to land on this screen.
Tip: If your account uses custom wording, your entry may read Calls → All Calls or Dashboard → Calls. The video’s intro demonstrates this exact click path.
3) Anatomy of a call group (grouped by phone number)
Each entry represents a call group (all calls from the same number):
-
Header row: Caller name/number, last activity time, and quick status pill.
-
Primary reason chip: e.g., Appointments, Refill, etc.
-
Language tag: The call’s detected/selected language.
-
Counts/indicators: Number of calls in the thread, unread/attention indicators.
-
Actions (hover or ⋯): Open details, update status, assign, create task, etc.
-
Expand/collapse: Click the row to expand the thread and see all related calls.
4) Primary reason, status, language & other metadata
-
Primary Reason: The top‑level categorization SimboConnect assigns (or your team sets) to describe why the caller reached out.
-
Status: Where this call thread stands in your workflow (e.g., New, In Progress, Waiting, Done). Click the status pill to update.
-
Language: Indicates the language of the call. Filterable for routing multilingual workloads.
-
Other fields: Time received, assignee, tags/labels, and counts may appear depending on your configuration.
5) Search the calls list
Use the Search box at the top right:
-
Click the Search field.
-
Type a name, number, reason, note keyword, or status.
-
Press Enter to run the search.
-
Clear the query to return to the full list.
Tip: Combine Search with Filters to narrow to a very specific working set.
6) Filter the calls list
Open Filter (top right) to include/exclude by common fields:
-
Click Filter.
-
Choose conditions (e.g., Primary reason = Appointments, Status = New, Language = Spanish).
-
Apply to update the list.
-
(Optional) Click Save as dashboard to store this filter permanently (see next section).
Note: The video shows creating these persistent views directly from the Filter panel.
7) Create & use persistent dashboards (shortcut chips)
Persistent dashboards are saved filters that appear as shortcut chips at the top (e.g., Appointments, Refill, Veronica):
-
Set your filters (and search, if needed).
-
Click Save as dashboard.
-
Name it clearly (e.g., Appointments, Refill, or a teammate’s name).
-
Your new dashboard appears as a chip. Click the chip anytime to re‑apply the view.
-
Re‑order or remove chips from the chip overflow/menu.
Team tip: Create common dashboards for roles (Front Desk, Refill team) so everyone lands on a focused queue with one click.
8) Work a call: open details, review notes/transcript, and navigate the call thread
-
Click a call group row to open the Call Details (drawer or page, depending on layout).
-
Review the AI/agent notes, summary, and any transcript/recording linked to the call.
-
Move through the thread (older/newer calls) to understand context.
-
Add a note or attach a task (see next section) as needed.
-
Update the status before closing the call details.
Goal: Each time you open a call, either complete it or push it forward (assign, task, schedule, or request info) and reflect that in the status.
9) Manage tasks from the dashboard
Tasks let you track follow‑ups tied to a call/thread.
-
Create a task: From the call row or details (via Add Task or ⋯), enter a title, due date, and (optionally) assignee.
-
Complete a task: Check it off from the call details or the row’s quick actions.
-
View task status: Task indicators show whether a thread has open items.
-
Linking: Tasks stay attached to the call group so future calls from the same number show relevant to‑dos.
Tip: Use concise task names (e.g., Confirm 10/12 appt window) so they read well in the row.
10) Update call status (single & bulk)
-
Single: Click the status pill on a row or in the details view and choose the next status.
-
Bulk: Use Select (checkboxes) to pick multiple rows, then choose a bulk action (e.g., Mark In Progress, Mark Done).
Best practice: Keep statuses truthful. If a task remains, avoid Done; choose Waiting/In Progress instead.
11) Assign, mention teammates, and hand off work
-
Assign: From the row (⋯) or details, choose Assign and pick a teammate or team queue.
-
Mentions: In notes, type @Name to notify a teammate and add context.
-
Handoffs: Combine Assign with a clear note and a task/due date when you need another person to take over.
12) Quick actions from the row (⋯ menu)
-
Open details
-
Update status
-
Assign
-
Add note
-
Create task
-
Archive/resolve (if enabled)
Exact options vary by role and configuration. The video demonstrates clicking through these to work a call without leaving the list.
13) Bulk select and bulk actions
-
Hover the list and check the rows you want to include.
-
Use the bulk bar at the top/bottom to apply actions (e.g., Status, Assign, Archive).
-
Confirm to apply changes to all selected threads.
14) Sort and time range controls
-
Sort: Choose newest first, oldest first, or by status/priority (depending on configuration).
-
Time range: Narrow the view to today, last 7 days, or a custom date range to focus work.
15) Filter by language and reason (operations views)
To route specific workloads:
-
Language routing: Filter Language = [Your target] to staff bilingual agents.
-
Reason routing: Filter Primary reason (e.g., Appointments, Refill) for specialized teams.
Save each as a persistent dashboard for one‑click access.
16) Create an “Appointments” view (example)
-
Click Filter.
-
Set Primary reason = Appointments.
-
(Optional) Add Status = New and a Time range.
-
Apply, then Save as dashboard and name it Appointments.
-
Use the Appointments chip to work these calls quickly.
17) Create a “Refill” view (example)
-
Click Filter.
-
Set Primary reason = Refill.
-
(Optional) Add Language or Assignee.
-
Apply, then Save as dashboard and name it Refill.
18) Create a teammate-specific view (example: Veronica)
-
Click Filter.
-
Set Assignee = Veronica (or filter by Created by/Team as needed).
-
Apply, then Save as dashboard and name it Veronica.
-
Click the Veronica chip anytime to review just that teammate’s workload.
19) Save, rename, and share a persistent dashboard
-
Save: From the Filter panel, choose Save as dashboard.
-
Rename: Open the chip’s menu (⋯) → Rename.
-
Share: Toggle Share with team (if available) so others see the chip.
-
Reorder/Pin: Drag to reorder chips or pin favorites to the visible row.
Call Details screen overview (single-page guide)
Purpose: Explain every part of the Call Details screen shown in the two snapshots and how staff can use it in one workflow.
Steps
-
Open the call
-
Click a call from your queue to open the Call Details screen.
-
-
Use the header bar
-
Select More info to view internal details such as Call ID, Copilot line, call time, duration, language, and call reason.
-
Use Block to block this number if it is spam. An admin can later unblock it.
-
Click I am Working on it to show ownership to your team.
-
Click Mark as Resolved when the work is complete, or use the Status menu to set Open, In-progress, Resolved, or Resolved No Response.
-
Use Assign To to send the call to a teammate. Click Submit to notify them by email.
-
Use the thumbs up or thumbs down icons to give quick AI feedback.
-
-
Review caller history on the left
-
Scroll the left panel to see all past calls and SMS from this phone number with time and status badges (Open, Resolved, and others).
-
Click any entry if you need to open a past interaction.
-
-
Read the transcript in the center
-
The center panel shows the full conversation between the Copilot and the caller.
-
Click the play icon next to any bubble to hear that exact part of the audio.
-
Use the copy icon on a bubble if you need the exact text.
-
-
Listen to the full recording
-
At the very bottom of the center panel, use the audio player to play the entire call recording.
-
-
Scan the AI summary and requests on the right
-
At the top of the right panel, confirm Patient Info such as DOB, patient ID, insurance ID, email, and phone. Use copy icons to copy values.
-
Read the Summary card to understand the call outcome in seconds. The example shows a three and a half minute call that the Copilot resolved.
-
Open PII Data to check key identity details captured in the call.
-
Review Open message for office if the patient left questions or messages.
-
Open Request – Need Appointment to see structured details such as reason (for example, Regular check-up) and provider (for example, Dr. John Foster).
-
Open Request – Confirm Appointment to see if a confirmation is needed or already done.
-
Use the Audit Trail button to view any automated actions or messages sent by the Copilot.
-
-
Add Staff Comments
-
At the lower part of the screen, type your note in Staff Comments and click Save. Examples: updates, call outcomes, or instructions for a teammate.
-
-
Optional quick actions
-
Use the phone button to call the patient back from this screen.
-
Use the message button to open SMS chat with the patient. You can send messages, receive replies, and download images the patient sends.
-
What you will see on this page
-
Header bar with More info, Block, I am Working on it, Mark as Resolved, feedback icons, Status menu, Assign To, and caller details.
-
Left panel with a timeline of this caller’s past calls and SMS, grouped by date, each with a status tag.
-
Center panel with the transcript bubbles, per-line play controls, and a full recording player at the bottom.
-
Right panel with Patient Info, Summary, PII Data, Open message for office, Request cards for appointments, and an Audit Trail button.
-
Staff Comments input and Save button.
-
Floating phone and message icons for quick call back and SMS.
Tips and good practice
-
Read the Summary first. It gives you the outcome in seconds and often removes the need to play the full call.
-
Use per-line play only when you must verify wording such as names, dates, or instructions.
-
Set Status and Assign To before you leave the page so teammates know the next step.
-
Use copy icons for Patient Info to paste clean data into your EHR.
-
Check the Audit Trail before sending a new SMS to avoid duplicate messages.
-
Add a short Staff Comment when you hand off a call so the next person has context.
Navigate the Call Details screen
Purpose: Help staff understand the three-panel Call Details screen and where to find common actions.
Steps
-
Open a call in Phone Copilot.
-
Look at the three columns on the screen.
-
Left: history for this caller.
-
Middle: full call transcript with play buttons.
-
Right: AI summary, requests, and patient info.
-
-
Use the top bar to see Caller ID and quick actions like Block, I am Working on it, and Mark as Resolved.
What you will see on this page
-
A vertical list of calls and SMS for this phone number on the left.
-
Transcript bubbles in the center with small play icons on each line.
-
An audio player for the full recording at the bottom.
-
A summary panel on the right with sections such as PII Data, Open Message for Office, Request blocks, and Patient Info.
Tips and good practice
-
Use the summary on the right first to understand the call in seconds.
-
Use the center panel only if you need exact wording or to verify a detail.
View caller history and past SMS
Purpose: See previous calls and text conversations from the same phone number.
Steps
-
Open a call.
-
In the left panel, scroll through the list to see time, status, and reason for each past interaction.
-
Select any item to open it.
-
Items labeled Open or Resolved show call records. Items labeled with a chat icon show SMS threads.
What you will see on this page
-
Timestamps with badges like Open, Resolved, Need Refill, Need Appointment.
-
Both calls and text messages for the same caller.
Tips and good practice
-
Use the history to avoid asking the patient to repeat information.
-
Check if a similar request was already resolved before creating a new task.
Play a specific audio part of the call
Purpose: Listen to the exact audio segment that matches a transcript line.
Steps
-
In the middle transcript, find the line you want to verify.
-
Click the small play button on that line.
-
The player will jump to that exact spot and play only that segment.
Tips and good practice
-
Use this when you doubt a transcription or need to confirm a date, name, or instruction.
Listen to the full call recording
Purpose: Review the entire call in one go.
Steps
-
Scroll to the bottom of the middle panel.
-
Use the full audio player to play, pause, or scrub through the recording.
Tips and good practice
-
The full audio is in the original language spoken by the caller and the Copilot.
-
The dashboard panels remain in English for consistent review.
Read the AI Summary and request blocks
Purpose: Understand the call quickly and see what Phone Copilot already handled.
Steps
-
Look at the right panel.
-
At the top, review Patient Info such as DOB, insurance ID, patient ID, email, and phone.
-
Read the Summary card to learn the purpose and outcome of the call.
-
Expand Request cards such as Need Appointment or Confirm Appointment to see the structured details.
-
Use the copy icons to copy any line if needed.
What you will see on this page
-
A short description of the call length and outcome.
-
Structured fields like reason, provider, and resolution.
Tips and good practice
-
Start here before you listen to audio. It saves time.
Send and receive SMS text chat
Purpose: Chat with patients by SMS from inside the call record.
Steps
-
Open the call and locate the chat box on the right side of the screen.
-
Type your message in the “Type your message” field.
-
Click the send icon to send an SMS.
-
When the patient replies, messages appear live in the same thread.
-
Click any image in the thread to view or download it.
What you will see on this page
-
Message bubbles with timestamps.
-
Buttons for Write with AI and Templates.
Tips and good practice
-
Patients can send pictures such as insurance cards. Phone Copilot can parse common IDs to help with data entry.
Use Write with AI and Templates in SMS
Purpose: Reply faster with suggested text and pre-built responses.
Steps
-
In the SMS composer, click Write with AI to get a draft reply based on the call summary.
-
Review and edit the suggestion if needed.
-
Click Templates to choose a pre-filled message for common situations.
-
Send your message.
Tips and good practice
-
Keep personal details accurate when using suggestions.
-
Save your clinic’s common phrases as templates for speed and consistency.
Call back a patient from the dashboard
Purpose: Place a return call without leaving the Call Details screen.
Steps
-
Open the call.
-
Click the call icon near the Caller ID or within the action area.
-
Confirm the number and start the call.
Tips and good practice
-
SimboConnect can also receive inbound calls, so you can manage the conversation in one place.
Block a spam or bot caller
Purpose: Stop the Phone Copilot from answering future calls from a spam number.
Steps
-
Open the call from the unwanted number.
-
Click Block at the top of the screen.
-
Confirm the action.
Tips and good practice
-
If you block a number by mistake, an admin can review the blocked list in the Admin dashboard and unblock it.
-
The audit trail shows who blocked the number and when.
Assign a call to a teammate and notify them
Purpose: Route work to the right person and create accountability.
Steps
-
Open the call.
-
Use the Assign To dropdown near the top right.
-
Choose the staff member.
-
Click Submit.
-
The assignee receives an email notification that the call has been assigned.
Tips and good practice
-
Add a Staff Comment to give context when you assign a call.
Set the call status
Purpose: Show progress and keep the queue clean.
Steps
-
Open the call.
-
Use the Status dropdown and choose one of these options:
-
Open
-
In-progress
-
Resolve
-
Resolved No Response
-
Delete
-
-
Click Mark as Resolved when the task is complete.
-
Use I am Working on it to broadcast that you have taken ownership.
Tips and good practice
-
Use Resolved No Response when you tried to reach the patient but did not connect.
Leave Staff Comments for your team
Purpose: Document follow-ups and decisions for later review.
Steps
-
Open the call and scroll to the Staff Comments box.
-
Type your note, for example, “Spoke with patient. Needs to discuss prescription with provider.”
-
Click Save.
What you will see on this page
-
A list of saved comments with timestamps.
Tips and good practice
-
Keep comments short and action-oriented.
-
Mention names or dates that others will search for later.
Copy patient data with one click into your EHR
Purpose: Copy phone numbers, IDs, and structured fields into your EHR without retyping.
Steps
-
In the right panel, find the field you need to copy
-
Click the copy icon next to the value.
-
Paste into your EHR.
Tips and good practice
-
Configure your preferred formats first so copied values match your EHR exactly.
Set Phone Number and Date of Birth Formats for EHR Copy Paste
Purpose: Make copied data paste directly into your EHR without edits.
Steps
-
Open any call.
-
In the right panel, locate the settings for Phone Number Format and Date of Birth Format.
-
Choose the format your EHR expects.
-
Phone example formats: (617) 800-9983, 617-800-9983, 6178009983.
-
DOB example formats: 12-03-1994, 12/03/1994, 1994-12-03.
-
-
Save your selection.
-
The display and copy action will now use your saved formats for all calls.
Tips and good practice
-
These settings are persistent. Set them once per workspace.
View the Audit Trail
Purpose: See automated actions performed by the Copilot and outbound messages sent to the patient.
Steps
-
Open the call.
-
Click Audit Trail near the top right.
-
Review the list of automated actions such as SMS messages and system updates.
Tips and good practice
-
Use the Audit Trail to confirm what the AI already sent before you send anything new.
Give quick feedback on the AI
Purpose: Help improve the Copilot and flag issues.
Steps
-
Open the call.
-
Use the thumbs up or thumbs down control near the top.
-
If a comment box appears, add a short note and submit.
Tips and good practice
-
Tell us what went well or what needs correction. Specific examples help the most.
Use More Info for call metadata
Purpose: Find the internal Call ID and related technical details for support.
Steps
-
Open the call.
-
Click More Info near the Caller ID.
-
Note the Call ID, Copilot line, call time, duration, language, and reason.
Tips and good practice
Verify patient identity and details
Purpose: Confirm who called and match the record to your EHR.
Steps
-
Open the call.
-
In the right panel, check Patient Info such as name, DOB, patient ID, insurance ID, email, and phone.
-
Use the copy icons to move any values into your EHR.
Tips and good practice
-
If the caller supplied photos of IDs in SMS, review them and download for the chart if your policy allows.
Confirm what Copilot already resolved
Purpose: Avoid double work by checking outcomes first.
Steps
-
Open the call.
-
In the Summary and Request sections on the right, look for items marked "RESOLVED".
-
If everything is complete, update the status to Resolved.
Tips and good practice
-
The summary also shows call length. Use it as a quick quality check.
Download and use patient images from SMS
Purpose: Capture photos that patients send and extract important details.
Steps
-
Open the SMS thread for the call.
-
Click on any image to open it.
-
Download if you need to attach it to the chart.
-
Use the parsed text that SimboConnect shows for common cards to copy values into your EHR.
Tips and good practice
-
Check that the image is clear before you rely on the extracted text.
Take ownership with "I am Working on it"
Purpose: Signal to your team that you are actively handling this call.
Steps
-
Open the call.
-
Click I am Working on it at the top.
-
Proceed with your actions such as SMS, assignment, or status updates.
Tips and good practice
-
This helps others avoid duplicate work while you are in progress.
Copy from transcript and share exact wording
Purpose: Capture exact phrases from the call when wording matters.
Steps
-
Anywhere in the screen identify the text you want.
- Locate a copy icon and click on it to copy the content
-
Paste it into your note or SMS.
-
If needed, click the play icon to confirm the audio for that line.
Steps to change DOB and phone format for direct copy
-
Locate the patient info on the right panel where phone and DOB appear.
-
Hover over them to see setting icon, click on it.
-
Choose a phone format such as:
-
(123) 456-7890
-
123-456-7890
-
1234567890
-
-
Choose a DOB format such as:
-
MM/DD/YYYY
-
DD/MM/YYYY
-
DD-MM-YYYY
-
Tips and good practice
-
Use this for medication names, dates, and quoted instructions.
Language handling in SimboDIYAS
Purpose: Know how languages work in the call review.
Steps
-
Listen to audio in the original language using the center or bottom players.
-
Read the dashboard content in English in the right panel.
Tips and good practice
-
This setup helps bilingual teams review calls even when the caller’s language is not English.
Manage SMS Text Chat With Patients in SimboDIYAS
Purpose: This guide explains how to use SimboConnect to send and receive SMS text messages with patients. It covers live chat, pictures, AI extraction from IDs and insurance cards, quick replies with Write with AI and Templates, and basic task management.
What you can do
-
Send SMS messages to a patient directly from SimboConnect.
-
Receive live SMS replies from the patient in the same chat panel.
-
Receive pictures the patient sends by SMS, view them in the chat, and download them.
-
Let AI read pictures of IDs and insurance cards and surface key details for easy copy and paste into your EHR.
-
Draft fast, consistent replies with Write with AI or Templates.
-
Assign or hand off the conversation as a task, and track its status.
Open the patient chat
-
Open the patient call, text interaction from the main home screen.
-
Go to the SMS Chat icon on top-left side on panel next to "More Info". You will see the message history, patient phone number, and controls such as Write with AI, Templates, the message text box, and the Send button.
Tip: The chat updates in real time. New patient messages will appear as they arrive.
Send a text message
-
Click in Type your message….
-
Write your message in simple, clear language.
-
Click Send.
The patient will receive the message as a normal SMS on their phone. Their reply will appear in the same thread.
Receive and manage replies
-
New messages appear at the bottom of the thread with a time stamp.
-
Use short follow-ups to confirm understanding, availability, or next steps.
-
If the topic turns into work for a teammate, use Assign To to hand it off and set the Status such as Open or Resolved as your workflow requires.
Handle pictures from patients
Patients can attach pictures in their SMS reply. Examples include a photo of a driver license, an insurance card, a referral, or a wound image.
-
View: Images appear inline in the chat.
-
Download: Click the image preview to download the file for your records. Save it based on your clinic policy.
AI extraction from IDs and insurance cards
When the picture looks like an ID or an insurance card, SimboConnect AI will parse key fields and show them in the chat panel. Examples include:
-
Member name
-
Policy or member ID
-
Group number
-
Plan name
-
Payer phone number
You can copy and paste these details into your EHR or intake forms. Always verify the text against the image before saving.
Reply faster with Write with AI
Write with AI creates a suggested response based on the call or chat context and the patient summary on the screen.
-
Click Write with AI.
-
Review the suggested reply.
-
Edit the text for tone and accuracy.
-
Click Send.
Good uses: acknowledging receipt of a document, sharing next steps, confirming a scheduled time, or giving simple instructions.
Reply faster with Templates
Templates are pre-written messages for common situations.
-
Click Templates.
-
Choose a template that fits the situation, for example appointment confirmation, document request, or prescription refill instructions.
-
Personalize the placeholders if needed.
-
Click Send.
Tip: Keep templates short and action oriented. Add a direct question if you need the patient to confirm or provide something.
Assign, track, and resolve
SMS conversations can create tasks. You can manage them in the same panel.
-
Assign To: Route the conversation to a specific teammate or queue.
-
Status: Mark the thread Open while work is in progress. Mark it Resolved when finished.
-
Audit Trail: Use the audit trail to see who sent which message and when.
This keeps ownership clear and helps your team respond on time.
Best practices
-
Keep messages short. Use one message per question or action.
-
Confirm identity before sharing sensitive information, following your clinic policy.
-
Verify AI-extracted fields against the image before updating the EHR.
-
Use Write with AI for speed, then edit for accuracy.
-
Use Templates for consistency across the team.
-
Close the loop. Mark the conversation Resolved when the patient has what they need.
Troubleshooting
-
Patient did not receive the SMS
-
Confirm the patient phone number in the patient info panel.
-
Send a short test message such as “Testing your clinic message service. Please reply YES if you received this.”
-
-
Picture is blurry or unreadable
-
Ask the patient to retake the photo in good light and fill the frame with the card.
-
Ask for front and back if it is an insurance card.
-
-
AI did not extract fields
-
Copy the details manually from the image this time.
-
Ask for a clearer picture. AI extraction works best with sharp, well-lit images.
-
Summary
With SimboConnect, your front office can handle SMS conversations in one place. You can send and receive texts in real time, accept and download patient pictures, use AI to extract key fields from IDs and insurance cards, respond quickly with Write with AI and Templates, and assign or resolve the work as a task. This keeps your patient messaging fast, accurate, and easy to manage.
View Resolved Calls in SimboDIYAS
Purpose: This article explains how to open the Resolved calls screen and how to read everything on it. Use this screen to review calls that were completed either by the Simbo AI Copilot or by your staff.
Who can use this
Front office agents, supervisors, and admins who manage inbound or outbound phone activity in Phone Copilot.
Open the Resolved calls screen
-
Sign in to the Phone Copilot dashboard.
-
In the top navigation, select Resolved calls.
-
The Resolved calls page opens and shows the most recent resolved calls.
Screen overview
The page has two main areas:
-
Filters and actions bar at the top
-
Select Copilot. Choose a phone line or Copilot to limit results.
-
Caller Number. Type a full or partial phone number to search.
-
Enter a Date Range. Pick start and end dates to see calls from a specific period.
-
Fetch History. Apply your filters and refresh the list.
-
Clear. Reset all filters.
-
-
Resolved calls table
A list of calls with one row per call. You can click any row to open more details.
Table columns explained
-
Phone No.
The caller’s phone number. A small language tag such as EN may appear next to it.
-
Copilot
The SimboConnect Copilot or phone line that handled the call, for example DEMO Line Integrated.
-
Primary Reason
The reason detected for the call, such as Request - Need Refill, Need Records or Request - Need Appointment.
-
Interaction Time
The time when the call interaction occurred.
-
Duration (MM:SS)
The call length in minutes and seconds.
-
Resolved at
The time when the call was marked as resolved.
-
Resolved by
Who resolved the call. This can be the Copilot when it resolved the request automatically or the name of a user when a person completed it.
-
Assigned To
The staff member responsible for follow up, if any.
Paging and list size
-
The header shows Showing 50 entries.
-
Use Prev 50 and Next 50 to move through older or newer pages of results.
View more details for a call
-
Click any row in the table.
-
The call details page opens where you can review the full information for that call.
Tips and good practices
-
Start with a Date Range when you are hunting for calls from a specific day or week.
-
Use Caller Number search to quickly find all calls from the same person.
-
If your team manages multiple lines, select the right Copilot before you click Fetch History.
-
Click Clear when results look unexpected to remove old filters.
-
Use Resolved by to separate calls completed by the Copilot from those handled by staff for reporting or coaching.
-
Check the Assigned To column to confirm ownership and avoid duplicate follow up.
Custom AI Agents in SimboDIYAS: Overview and Use Cases
Purpose: Explain what custom AI agents are, why they are useful for front office teams, and how to open them from the Phone Copilot app.
What are custom AI agents
Custom AI agents in Phone Copilot automate repetitive front office tasks. They are designed for HIPAA compliance inside your Simbo AI environment. From the top bar, open HIPAA Compliant AI Agents to see available tools such as language translation, SimboGPT, and custom letter creation.
Why this helps your practice
-
Reduce time on routine work such as letters and translations.
-
Improve patient experience with quick language help at the desk or on calls.
-
Keep Protected Health Information inside SimboConnect, which is designed for HIPAA compliance.
Where to find the agents
-
Sign in to Phone Copilot.
-
Look at the top bar and select HIPAA Compliant AI Agents.
-
Choose an agent from the dropdown. e.g. AI Language Translator, SimboGPT, and many more.
Common examples
-
Use AI Language Translator to speak with a walk‑in patient who speaks another language.
-
Use SimboGPT to ask HIPAA compliant questions, draft short messages, or generate simple checklists.
-
Use Custom Letters to dictate a letter on your practice letterhead in a few seconds.
-
Use Translator on a Call to bridge two people who speak different languages during a phone call.
Access and roles
-
Access to agents may depend on your practice settings. If you do not see an agent, ask your administrator.
Tips and good practices
-
Start with small tasks while your team learns the tools.
-
Keep your prompts short and clear. Include patient ID or appointment details only when needed.
-
Review the output before you share or print it.
-
Use the built‑in tools instead of public AI sites to keep data inside Phone Copilot.
Create Custom Letters with Voice
Purpose: Show how to create a draft letter on your practice letterhead using voice. Your menu may show Custom Letters or another name.
What you can do
-
Dictate a request and get a letter draft on your practice letterhead.
-
Use plain speech. The agent turns it into a formatted letter.
Steps
Example voice prompts
-
“Create a letter for patient ID 56789 to excuse absence for today with follow‑up on Friday.”
-
“Draft a referral letter to Dr. Anita Shah for patient ID 24680 for physical therapy evaluation next week.”
Troubleshooting
-
If the draft is missing details, speak the request again with more specifics such as dates and recipient.
-
If the mic does not start, check your browser permission for microphone access.
Tips and good practices
-
State patient ID, recipient, and purpose in your first sentence.
-
Spell uncommon names slowly.
-
Review every letter before printing or sending.
-
Keep voice notes in a quiet space for best accuracy.
Work with SimboGPT (HIPAA Compliant AI Chat)
Purpose: Explain how to use SimboGPT to get help from an AI chat that is designed for HIPAA compliance.
What you can do
-
Ask questions and get quick answers inside SimboConnect.
-
Draft short messages, call scripts, or checklists.
-
Rephrase text into clear and simple language.
Steps
-
Open HIPAA Compliant AI Agents on the top bar.
-
Select SimboGPT.
-
Type or paste your question. You can also click the mic if available and speak.
-
Read the answer. Ask follow‑up questions if you need more detail.
-
Copy the result into your message, letter, or note as needed.
Sample prompts
-
“Write a short reminder message about tomorrow’s appointment at 10 AM for patient ID 12345.”
-
“List three check‑in questions to confirm insurance and contact information.”
-
“Rewrite this sentence in plain english: ‘Please bring your most recent medication list.’”
Safety notes
-
Use SimboGPT for work tasks inside SimboConnect. Do not paste PHI into public AI websites.
-
Always review the answer for accuracy and policy compliance before sharing.
Tips and good practices
-
Give context in one or two lines. Example: specialty, purpose, and audience.
-
Ask for a specific format. Example: “3 bullet points,” or “one paragraph.”
-
Keep prompts short. One task per prompt works best.
AI Language Translator at the Front Desk
Purpose
Help staff translate a live conversation with a walk‑in patient using the microphone. This tool supports more than 50 languages.
What you can do
-
Listen to the patient and see or hear a translation in your language.
-
Speak back and have your response translated for the patient.
Steps
-
Open HIPAA Compliant AI Agents.
-
Select AI Language Translator.
-
Choose the patient language and your language.
-
Click the mic to start listening.
-
Let the patient speak. The agent shows or plays the translation.
-
Click reply or press the mic to speak your response. The agent translates it back.
-
End the session when the conversation is complete.
Help the patient feel comfortable
-
Start with a friendly line: “We will use a translator to help us.”
-
Speak slowly and use short sentences.
Tips and good practices
-
Confirm key details like dates, times, and names by repeating them.
-
For sensitive topics, move to a private area.
-
If the room is noisy, use a headset mic.
-
Document important decisions in the chart using your normal workflow.
AI Agent Translator on a Phone Call
Purpose: Explain how to set up a two‑party phone call where the AI translates between both callers in turn, similar to a human translator.
What you can do
-
Connect two phone numbers that speak different languages.
-
Let the AI translate each side in turn during the call.
Steps
-
Open HIPAA Compliant AI Agents.
-
Select AI Translator on a Call.
-
Enter the two phone numbers. Example: patient and specialist office.
-
Set the preferred language for each party.
-
Start the call. The AI will speak to each person in turn and translate what was said to the other party.
-
When finished, end the call.
Best use cases
-
Scheduling with a patient who prefers another language.
-
Coordinating with a family member or interpreter substitute when a live human is not available.
Tips and good practices
-
Tell both parties that an AI translator is on the line.
-
Pause after each sentence to allow accurate translation.
-
Confirm critical details such as dates, times, addresses, and medication names.
-
If the person changes phones during the call, restart and re‑enter the new number.
Enable or Create a Custom AI Agent
Purpose: Explain how your practice can request, scope, and enable a new custom AI agent in SimboConnect.
Who can request this
-
Your practice administrator or front office lead.
-
Any staff member may start the request and include the administrator.
How to request
-
Prepare a short description of the task you want to automate.
-
Contact your account manager or send an email to support-connect@simbo.ai
-
In your message include:
-
The task to automate. Examples: emails, phone calls, letters, language translation, faxes.
-
Whether you want the agent to integrate with your EHR and any other tools.
-
The steps the agent should follow and any rules to follow.
-
Sample inputs and the expected output. If a letter is needed, share the letterhead template.
-
Language needs, if any.
-
Any compliance or privacy notes specific to your practice.
-
What happens next
-
The Simbo AI team reviews your request and confirms scope.
-
You receive an estimate, a proposed timeline, and any access needs.
-
If integrations are required, you may be asked to provide test access or vendor contacts for your EHR or other systems.
-
The team builds the agent, tests it with sample data, and shares a preview for your approval.
-
After approval, the agent is enabled in your SimboConnect account and your staff receives a quick walkthrough.
Timelines
-
Simple, single step agents such as Custom Letters are usually completed in a few days.
-
Multi step automation such as sending emails and follow up calls will take longer because they include several actions and checks.
-
Any agent that requires integration with an EHR or other external tools may take more time. The timeline depends on the external vendor and how long it takes to complete the integration work.
Who can use these custom AI Agents in your practice
-
The Simbo AI team can enable these custom AI agents individually to be available for specific users or specific locations or complete organization.
- Reach out to your account manager and provide details to enable/disable access to the custom AI agents.
After go live
Tips and good practices
-
Describe the desired result first, then list the steps.
-
Keep the first version simple. Add advanced steps after the team has used the agent for a week or two.
-
Provide real examples, redacted if needed, so the team can test accurately.
-
If the agent touches PHI, confirm user roles and audit needs during scoping.
Manage Dashboard Logins: Page Overview and Quick Actions - Admin Panel
Purpose
Help an admin understand the Dashboard Logins list and use the quick action icons for each user.
Where to find this
Admin tab → Dashboard Logins.
What you see
-
Dashboard User List table with columns: No., User Type, Name, Email, Organization, Mobile.
-
Select Organization dropdown at the top to view users for one organization.
-
Search field labeled Enter to search to filter the list.
-
Add New button on the top right to create a user.
-
For each user row, three action icons:
-
Green pencil: Edit user details.
-
Blue lock: Reset user password.
-
Red cross: Delete user.
-
Steps: Use quick actions
-
Locate the user in the list. Use Select Organization or the search field if needed.
-
Click one of the icons in the user row:
-
Green pencil to open Edit Dashboard User.
-
Blue lock to open Reset Password.
-
Red cross to open Confirm Delete User.
-
Result
You are taken to the action screen for the selected user.
Tips and Good practices
-
Use the Select Organization filter before you search to reduce noise.
-
Confirm you selected the correct user by checking both Name and Email.
-
Prefer least‑privilege access. Assign Admin only when required.
Add a New Dashboard User - Admin Panel
Purpose
Create a new SimboConnect dashboard login, and optionally add the user as an On Call Provider.
Where to find this
Admin tab → Dashboard Logins → Add New.
Prerequisites
-
You must have Admin permissions in Phone Copilot.
-
You must know the user’s email address. Mobile number is optional.
Steps
-
In User Type, choose the role for this user, for example Admin, Frontdesk User, or Staff.
-
In Select Organization, pick the organization this user belongs to.
-
Enter the user Email.
-
(Optional) Check Also add as an On Call Provider if you want this user added to On Call Providers.
-
Enter Mobile if you have it. The example format is +1‑XXX‑XXX‑XXXX.
-
Click Submit to create the user.
Result
The new user appears in the Dashboard User List for the chosen organization.
Tips and Good practices
-
Use real, unique email addresses to avoid login conflicts.
-
Choose the correct User Type based on job function. Upgrade later only if needed.
-
Add the mobile number to support notifications and password help.
Edit an Existing Dashboard User - Admin Panel
Purpose
Update a user’s organization, name, and role information.
Where to find this
Admin tab → Dashboard Logins → in the user row, click the green pencil icon.
Steps
-
Review the Email at the top to confirm you are editing the right user.
-
Update User Type if you need to change permissions.
-
Update Select Organization if the user has moved teams.
-
Update Firstname, Middlename if used, and Lastname.
-
Add or update Mobile. You can follow +1‑XXX‑XXX‑XXXX as a guide.
-
Click Submit to save changes.
Result
The user record updates in the Dashboard User List.
Tips and Good practices
-
Keep names consistent with HR or directory records.
-
Review access after role changes and remove unused high‑privilege roles.
-
When moving a user between organizations, verify call routing and on‑call assignments.
Reset a User Password - Admin Panel
Purpose
Create a new password for a user who cannot log in or needs a security reset.
Where to find this
Admin tab → Dashboard Logins → in the user row, click the blue lock icon.
Steps
-
Confirm the User Type and Email shown on the page match the intended user.
-
Enter a New Password.
-
Re‑enter the same value in Confirm New Password.
-
Click Submit.
Result
The user password is updated. The user can sign in with the new password.
Tips and Good practices
-
Use a strong password with a mix of letters, numbers, and symbols.
-
Do not reuse old or shared passwords.
-
Ask the user to change the password after first login if your policy requires this.
Delete a Dashboard User - Admin Panel
Purpose
Remove a user’s access to the SimboConnect dashboard.
Where to find this
Admin tab → Dashboard Logins → in the user row, click the red cross icon.
Steps
-
Click the red cross in the user’s row.
-
In the Confirm Delete User dialog, review the email and user type.
-
Click Confirm to complete the deletion. Click Cancel if you do not want to proceed.
Result
The user is removed from the Dashboard User List and can no longer log in.
Tips and Good practices
-
Delete accounts that are no longer needed to reduce risk.
-
Before deletion, check hand‑offs for on‑call or front desk responsibilities.
-
If you only want to block access temporarily, consider a role change or a password reset instead of deletion.
Search and Filter Dashboard Users - Admin Panel
Purpose
Quickly find users in large organizations.
Where to find this
Admin tab → Dashboard Logins.
Steps
-
Use Select Organization at the top to narrow the list to one organization. This will be visible only if you have access to multiple organizations or locations.
-
In Enter to search, type part of a name, email, or role to filter results.
Result
The table shows only the rows that match your filter.
Tips and Good practices
-
Combine the organization filter with a short search term for best results.
-
Clear the search box to return to the full list.
Access and understand the On Call Providers page - Admin Panel
Purpose: Help you reach the On Call Providers screen and understand what is on it.
Where to find this
-
Sign in to the Phone Copilot Admin.
-
In the left menu, under Organization Settings, select On Call Providers.
What you see
-
A table with columns for No., Name, Email, and Mobile.
-
A Search box at the top of the table to quickly find a provider.
-
A Select Organization dropdown to switch the organization context.
-
An Add New button on the top right to create a provider.
-
For each row, two action icons on the right:
-
A green Edit icon to update a provider.
-
A red Delete icon to remove a provider.
-
Result
You are ready to add, edit, delete, or search for on-call providers.
Tips / Good practices
-
Confirm you are on the correct organization using Select Organization before making changes.
-
Use the Search box to avoid editing the wrong person.
-
Review the list after any change to confirm the update is visible.
Add a new On Call Provider - Admin Panel
Purpose: Guide you to create a new on-call provider record.
Steps
-
Go to On Call Providers in the left menu.
-
Click Add New on the top right.
-
On the Add On Call User page, fill in:
-
Firstname
-
Lastname
-
Email
-
Mobile in the format shown on screen (example pattern: +1-XXX-XXX-XXXX)
-
-
Click Submit to save.
-
Use Reset if you want to clear the form before submitting.
-
Click Back at the top if you want to return without saving.
Result
The new provider appears in the On Call Providers list.
Tips and good practices
-
Enter the mobile number in the exact format shown to prevent validation errors.
-
Use a monitored email address because SimboConnect may send alerts to it.
-
Add the provider to the appropriate on-call schedules after creation.
Edit an existing On Call Provider - Admin Panel
Purpose: Show you how to update a provider’s details.
Steps
-
Open On Call Providers.
-
Find the provider using the Search box if needed.
-
Click the green Edit icon on that row.
-
On the Edit On Call User page, update any of the following:
-
Firstname
-
Lastname
-
Email
-
Mobile (follow the on-screen format)
-
-
Click Submit to save the changes.
-
Click cancel to discard changes and go back.
Result
The list updates with the new details for that provider.
Tips and good practices
-
Verify spelling of names to keep caller prompts accurate.
-
If you change a mobile number or email, inform your team so they know the new contact.
-
Review upcoming schedules to make sure notifications go to the updated contact.
Delete an On Call Provider safely - Admin Panel
Purpose: Explain how to remove a provider and avoid schedule issues.
Important check before deletion
If the provider is part of any On Call schedule or Vacation Override in the future, remove or replace the provider in those items first. This prevents broken escalation paths and missed coverage.
Steps
-
Open On Call Providers.
-
Find the provider and click the red Delete icon.
-
A confirmation window opens showing the provider’s details and a reminder to check schedules.
-
Click Back to cancel. Click Confirm to delete.
Result
The provider is removed from the list. If the user was still on a future schedule, update those schedules immediately to maintain coverage.
Tips and good practices
-
Always review On Call Schedule and Vacation/Temporary Changes in the left menu before confirming a deletion.
-
Export or note any information you may need later because deletion removes the record from this list.
-
If you only need a temporary removal, consider updating the schedule instead of deleting the provider.
Search, filter, and switch organizations on the On Call Providers page - Admin Panel
Purpose: Help you quickly find the right provider and operate in the correct organization.
Steps
A) Search for a provider
-
Open On Call Providers.
-
In Enter to search, type part of the name, email, or phone.
-
The table narrows to matching rows.
B) Switch organization
-
Use the Select Organization dropdown above the table.
-
Choose the target organization.
-
The list refreshes to show providers for that organization.
Result
You see only the providers you need, in the right organization context.
Tips and good practices
-
Use short, unique parts of a name or email to speed up search.
-
Always confirm the selected organization before adding or editing a provider.
-
After switching organizations, glance at the table header to ensure the context is correct.
Copilot Settings page in SimboDIYAS
Purpose: This article explains what you see on the Copilot Settings page in the Phone Copilot admin panel and what each field or button does.
Where to find this
-
Sign in to the Phone Copilot admin panel.
-
Select Admin on the top bar.
-
In the left menu, open Copilot Settings.
What you see
-
Select Organization. Choose the organization you want to manage.
-
Copilot Number. Read only. This is the phone number used by your Copilot.
-
Label. Editable. A friendly name that helps your team recognize this Copilot.
-
Language. Read only. The current language configured for this Copilot.
-
Default Greeting. Editable. The message callers hear when there is no temporary override in effect.
-
Edit. Enables editing of the editable fields in this section.
-
Add Holiday or Temporary Greeting Override. Opens a form to create a time bound greeting that takes priority over the default greeting during the selected window.
-
Holiday or Temporary Greeting Override panel. Contains:
-
From date and time.
-
To date and time.
-
Greeting text area.
-
Cancel and Save.
-
How it works
-
The Default Greeting plays for all calls unless a Holiday or Temporary Greeting Override is active.
-
When an override is active between the From and To times, callers hear the override greeting first.
-
When the override window ends, the system returns to the Default Greeting automatically.
Tips and good practices
-
Keep the Label short and meaningful, for example “Main Clinic Line”.
-
Review the Language and Copilot Number before you start, so you edit the correct Copilot.
-
Keep messages clear and under 20 to 30 seconds so callers stay engaged.
-
Test after every change by placing a quick test call.
-
Record change dates in your internal notes so your whole team stays aligned.
Change the Copilot label
Purpose: This article shows how to rename the Copilot label that your internal team sees.
Steps
-
Go to Admin → Copilot Settings.
-
Make sure the correct Select Organization is chosen.
-
Click Edit.
-
In Label, type the new name.
-
Click Save if a save button is shown for the section, or move focus to store the change if saving is automatic.
-
Verify the new label appears at the top of the page.
Notes
-
Copilot Number and Language are read only. You cannot change them here.
-
Labels help filter and find the right Copilot in reports and other screens.
Set or update the Default Greeting - Admin Panel
Purpose: This article explains how to create or edit the message that callers hear by default before AI takes over.
Steps
-
Go to Admin → Copilot Settings.
-
Click Edit.
-
Find Default Greeting.
-
Enter the greeting text you want callers to hear.
-
Click Save.
-
Place a test call to confirm the new greeting is spoken.
What callers will hear
-
The default greeting plays for all calls when there is no active temporary override.
-
When an override exists, callers hear the override greeting during its time window. After the window ends, the default greeting returns automatically.
Tips and good practices
-
Start with a friendly welcome and your organization name.
-
State the main options or next step in simple language.
-
Avoid long pauses and complex sentences.
-
If you support multiple languages on other lines, mention the correct path briefly.
-
Review the message every quarter to keep it current.
Add a Holiday or Temporary Greeting Override - Admin Panel
Purpose: This article shows how to create a time bound greeting for holidays, office closures, or special events.
Steps
-
Go to Admin → Copilot Settings.
-
Click Add Holiday or Temporary Greeting Override.
-
In the panel that opens:
-
Set the From date and time when the override should start.
-
Set the To date and time when the override should end.
-
Type the Greeting that callers should hear during this period.
-
-
Click Save.
What happens next
-
During the From to To window, callers hear the temporary greeting first.
-
After the To time passes, the system resumes the Default Greeting without any extra action.
Tips and good practices
-
Add the reason for the change, for example “office closed for maintenance” or “reduced hours”.
-
Include the date and time when normal service resumes.
-
Create the override at least one day in advance to avoid last minute errors.
-
Double check time zone settings for the dates you enter.
-
Place a test call at the start time to confirm the override is active.
How greeting priority works - Admin Panel
Purpose: This article clarifies which message the caller hears and when.
Priority rules
-
If a Holiday or Temporary Greeting Override is active within its From and To window, the caller hears the temporary greeting.
-
If no override is active, the caller hears the Default Greeting.
-
When the override window ends, the system returns to the default greeting by itself.
Visual cues in the UI
-
The override panel shows the From and To window and the Greeting text that will play.
-
The default greeting field shows the message that will play outside the override window.
Tips and good practices
-
Before a holiday, confirm the override window and the default message are both correct.
-
After the holiday, confirm that calls again play the default greeting.
-
Keep a shared calendar reminder for upcoming closures so you set overrides on time.
Input Forms Label Reference for Copilot Settings - Admin Panel
Purpose: This article lists each field and button on the page with a short description.
Input Forms Label Reference
-
Select Organization. Choose which organization’s Copilot you are editing.
-
Copilot Number. Read only. The phone number associated with this Copilot.
-
Label. Editable. Internal name for the Copilot.
-
Language. Read only. The current language of the Copilot.
-
Default Greeting. Editable. The standard message for inbound callers.
-
Edit. Enables editing of the fields in the Copilot section.
-
Add Holiday or Temporary Greeting Override. Opens the override panel.
-
From. Start date and time for the override to become active.
-
To. End date and time for the override to stop being active.
-
Greeting. The message that will play during the override window.
-
Cancel. Discards changes in the override panel.
-
Save. Saves changes in the override panel.
Tips and good practices
-
Treat Copilot Number and Language as fixed settings on this page.
-
Use Edit before changing any editable field.
-
Save often when working near busy times so changes are not lost.
Troubleshooting greeting changes - Admin Panel
Purpose: This article helps you resolve common issues after editing greetings.
Checklist
-
I changed the Default Greeting but callers still hear the old message
-
Check if a Temporary Greeting Override is active. If yes, callers will hear the override until the To time.
-
-
My temporary greeting did not play at the planned time
-
Confirm the From and To times and the correct time zone.
-
Verify that you clicked Save in the override panel.
-
-
The default greeting did not return after the holiday
-
Confirm the To time has passed.
-
Refresh the page and review the override panel for any future dates.
-
-
I edited the label but the name did not update for other users
-
Ask teammates to refresh their browser.
-
Confirm you edited the correct organization.
-
Tips and good practices
-
Always test with a real call after a change.
-
Keep a short internal log of who changed what and when.
-
When in doubt, copy your greeting text to a document before editing so you can restore it quickly.
Message Templates in SimboDIYAS: Overview - Admin Panel
Purpose: Explain what Message Templates are and where to find them in Phone Copilot.
What are Message Templates
Message Templates are reusable SMS messages for your front office team. You can save common replies and send them quickly during patient chats. Templates saved in the Admin panel are available to all users in your organization.
Where to find Message Templates
-
Open Phone Copilot and sign in.
-
Select Admin on the top navigation.
-
In the left sidebar, open Copilot Settings.
-
Click Message Templates.
What you see on the list page
-
Search field to find a template.
-
Select Organization dropdown at the top center.
-
A table with columns for No., Template Heading, and Template.
-
Action icons on each row to Edit or Delete a template.
-
An Add New button on the top right to create a new template.
Result
You understand the purpose of templates, where they live, and how the list page is organized.
Tips and good practices
-
Keep template headings short and clear so users can find the right message quickly.
-
Use the Search box before creating a new template to avoid duplicates.
-
Remember that templates created here are shared with everyone in your organization.
Viewing and Searching Message Templates - Admin Panel
Purpose: Show how to browse and search the existing templates.
Steps
-
Go to Admin > Copilot Settings > Message Templates.
-
If you manage more than one organization, pick the correct one from Select Organization.
-
Use the Search box above the table to filter by words from the heading or the message text.
-
Scroll through the table to review results. The Template column shows the message content.
Result
You can quickly find the template you need without opening each row.
Tips and good practices
-
Try common keywords such as “appointment,” “reschedule,” or “payment.”
-
If you cannot find a match, consider creating a new template with a unique heading.
-
Review the list every few months and remove unused items to keep search results clean.
Creating a New Message Template - Admin Panel
Purpose: Guide an administrator through adding a new template that is shared with all users.
Steps
-
Open Admin > Copilot Settings > Message Templates.
-
Confirm Select Organization is set to the right organization.
-
Click Add New.
-
On the Create New Template screen:
-
Enter a Template Heading. Example: “Appointment Confirmation”.
-
Enter the Template Text. Example: “Based on your request with Simbo, your appointment is scheduled on <appt_time>. Reply Y to confirm. Reply C to change.”
-
-
Click Save to publish the template for your organization.
-
Click Cancel if you do not want to save your changes.
Result
The new template appears in the list and is available to all users during SMS chats.
Tips and good practices
-
Write in clear, patient-friendly language.
-
Keep messages short. Long texts may be split across multiple SMS messages by carriers.
-
Use placeholders such as <appt_time> only if your workflow supports them. Test before broad use.
-
Do not include protected health information that is not required for the purpose of the message.
Editing an Existing Message Template - Admin Panel
Purpose: Show how to update the heading or text of a template.
Steps
-
Go to Admin > Copilot Settings > Message Templates.
-
Use Search to find the template you want to change.
-
On the row, click the Edit icon (pencil).
-
On the edit screen, update the Template Heading and Message Text as needed.
-
Click Save.
Result
Your changes are saved and the updated template is immediately available to all users.
Tips and good practices
-
Notify your team if you change the meaning of a commonly used template.
-
Keep the heading stable when possible so users recognize the item.
-
Review placeholder spelling after edits so variables such as continue to work.
Deleting a Message Template - Admin Panel
Purpose: Explain how to safely remove a template that is no longer needed.
Steps
-
Open Admin > Copilot Settings > Message Templates.
-
Find the template you want to remove.
-
Click the Delete icon (trash).
-
In the confirmation dialog Are you sure you want to delete?, click Submit to confirm or Cancel to keep the template.
Result
The template is removed from the list and is no longer available to users.
Tips and good practices
-
Delete only templates that are unused or outdated.
-
If a message needs temporary removal, consider adding “Do Not Use” to the heading first, then delete after team review.
-
Export or copy the message text to a safe place before deletion if you might need it later.
Using Placeholders in Message Templates - Admin Panel
Purpose: Describe how to work with placeholder fields inside template text.
What are placeholders
Placeholders are tags inside angle brackets that your team can replace with real values at send time. For example: <appt_time> used in "Based on your request with Simbo, your appointment is scheduled on <aptt_time>. Reply Y to confirm. Reply C to change".
How to add placeholders
-
In the Template Text box, type the placeholder exactly as configured in your workflow.
-
Save the template.
Tips and good practices
-
Use only placeholders that your organization supports. If unsure, check with your Phone Copilot administrator.
-
Keep placeholders readable and consistent across templates.
-
Always send a test message to a test contact before wide use.
Selecting Specific Organization Settings across the Admin Panel
Purpose: Explain how the Select Organization control works across all Admin sub-menus in Phone Copilot, who can see it, and what an organization means in this context.
What an “Organization” Means
In Phone Copilot, an organization can be any of the following, depending on how your account is set up:
-
A different legal organization
-
A different location or site
-
A different department or service line
Admins can use the same Admin screens to view or change settings separately for each organization, site, or department.
Who Sees Select Organization
-
The Select Organization control is available only to users who have access to more than one organization, location, site, or department.
-
If you have access to only one, the control may not appear.
Where You Will See It
The Select Organization control appears near the top of Admin pages across sub-menus, for example:
-
Organization Settings
-
Copilot Settings, including Message Templates
-
On-call Schedule Management sections
What It Does
Changing the selection changes the context of the page. You will view and modify settings for the chosen organization only. Items like templates, schedules, and other Admin settings are specific to that selection.
How To Use It
-
Sign in to Phone Copilot.
-
Open Admin from the top navigation.
-
Locate Select Organization near the top of the page.
-
Open the dropdown and choose the organization, site, or department you want to manage.
-
Review or update settings in the current sub-menu.
-
Repeat the selection steps when you need to switch to a different organization.
How To Enable Multiple Locations/Org Access
If you have an admin in your team who has access to all orgs, please ask them to edit your user access with that. If not, please contact your account manager or send email to support-connect@simbo.ai.
Result
You manage each organization, site, or department independently from the same Admin screens, with changes applied only to the selected context.
Tips and good practices
-
Confirm the selected organization before creating, editing, or deleting any item.
-
Save your changes before switching organizations to avoid losing unsaved work.
-
Use consistent naming across organizations. For example, prefix template headings with a short site or department code to make search easier.
-
If you cannot find an item, switch the organization and search again.
-
Limit access to only the organizations a user needs. This reduces errors and keeps lists shorter.
Unblock Callers - Admin Panel
Purpose: Use this page to restore calling access for phone numbers that were previously blocked in Phone Copilot. Admins can search for blocked caller IDs, review who blocked them and when, and unblock a number if it was blocked by mistake.
How to get here
-
Go to Admin.
-
In the left menu, select Unblock Caller.
Page overview
-
Search: Find a blocked caller by entering a full or partial phone number.
-
Select Organization: Choose the organization to view or manage its blocked callers. This is important if your account manages multiple organizations.
-
Blocked callers list: Shows each caller ID with the following details:
-
Caller ID
-
Blocked By
-
Blocked On
-
-
Actions: Each row includes an action to Unblock that caller.
If there are no entries, it means there are no blocked caller IDs for the selected organization.
Unblock a caller
-
Select the correct Organization.
-
Use Search to locate the caller ID, or scroll the list.
-
Review Blocked By and Blocked On to confirm the entry is correct.
-
Click Unblock for that caller.
-
Confirm the action if prompted.
After unblocking, the number is removed from the blocked list and can call your Phone Copilot lines again.
Find a specific caller quickly
-
Type the full phone number if you have it.
-
If you only know part of the number, type the digits you know to narrow the list.
-
Make sure the correct Organization is selected before you search.
Troubleshooting
-
I do not see any entries: There are no blocked callers for the selected organization, or you may need to change the organization.
-
I cannot click Unblock: Make sure you are signed in as an Admin.
-
The caller is still unable to reach us: Confirm the correct number was unblocked. Check if the number is blocked in other systems such as your carrier or phone hardware.
Tips and good practices
-
Use the Blocked By and Blocked On details to verify the reason and timing before unblocking.
-
Unblock only numbers that were blocked by mistake or that you have reviewed with your front office team.
-
After unblocking, let your team know so they can expect calls from that number again.
-
If your organization has multiple business lines, repeat the check for each relevant organization.
-
Keep a short internal note or ticket for unblocks so your team has a record of why the change was made.
Manage Holidays and Unplanned Off-Hours - Admin Panel
Purpose: Use this page to tell Phone Copilot when your front office is closed. During these times the AI Phone Copilot switches to after-hours mode.
Access
-
Open Admin.
-
Select Holiday/Off-Hour Schedule.
-
If you manage more than one organization, choose the correct organization from the selector at the top.
What you can do here
-
View all existing holiday and off-hour entries.
-
Add a new one-time or multi-hour closure.
-
Edit an entry.
-
Delete an entry.
Add a new holiday or off-hour entry
-
Select Add New.
-
Enter a clear Name. Example: Christmas, Office Training, Power Outage.
-
Set From Date Time and To Date Time for the closure window.
-
Save.
Result: The entry appears in the table and the copilot treats that window as after-hours.
Mark unexpected off-hours
Use the same Add New flow:
-
Name it something like Unplanned Off-Hours or Team Training.
-
Set the exact start and end time for the short closure.
-
Save.
Edit an entry
-
Find the entry in the table.
-
Select the Edit icon.
-
Update the name or the time window.
-
Save.
Delete an entry
-
Find the entry in the table.
-
Select the Delete icon.
-
Confirm the deletion.
How the schedule works
-
Each row defines a closed window. While the window is active, Phone Copilot runs in after-hours mode.
-
You can have multiple entries on the same day. The copilot treats any time covered by any entry as closed.
Troubleshooting
-
If an entry does not seem to apply, check that the start time is before the end time and that the dates are correct.
-
If after-hours triggers too early or too late, check your organization time zone in your settings.
Tips and good practices
-
Keep names short and clear so your team understands each entry.
-
Use separate entries for different reasons to make audit easier.
-
Avoid overlapping time windows unless you truly need them.
-
Review the list monthly so the schedule stays up to date.
-
For one-off short closures, create a clearly labeled custom entry and remove it after it passes.
Import and Export Holiday Schedules with Excel - Admin Panel
Purpose: Use Excel to add many closures at once, or to back up and share your schedule outside Phone Copilot.
Access
Open Admin > Holiday/Off-Hour Schedule.
Export the current schedule
-
Select Export Holiday Schedule (Excel).
-
Save the file. It contains your existing entries.
Prepare a file for bulk upload
-
Open the exported Excel file or your internal template.
-
Add or edit rows with the following fields:
-
Name of the holiday or off-hour.
-
From Date Time.
-
To Date Time.
-
-
Use the date and time format shown in your account. Keep start before end. Do not include notes in extra columns.
Upload a holiday schedule
-
Select Upload Holiday Schedule.
-
Choose your Excel file.
-
Confirm the upload and wait for the success message.
Result: New rows are added. Rows that match existing items by identifier or exact values are updated, depending on your configuration.
Maintain the schedule over time
-
Use Add New for quick one-off changes.
-
Use Export, edit in Excel, and Upload for many changes at once or for annual planning.
Troubleshooting
-
If the upload fails, check column headers and date formats.
-
Remove blank rows and hidden sheets before uploading.
-
If duplicates appear, remove the extra row in Excel and upload again, or delete the item in the table.
Tips and good practices
-
Always export before a large update so you have a backup.
-
Keep a master Excel file for the year and refresh it after each change.
-
Use consistent names for recurring holidays to make searches easy.
-
Validate dates for national holidays once per year, then upload the full list in one step.
-
After a bulk upload, scan the table for time windows that overlap by mistake.
On-Call Scheduling Overview - Admin Panel
Purpose
Explain how Phone Copilot routes after-hours calls to the right person using on-call schedules.
What the feature does
-
Lets you assign on-call coverage by date and time.
-
Supports a calendar view and a table view of all entries.
-
Uses Default Schedules to handle missing coverage through a Fallback Schedule.
-
Supports Recurring Schedules for repeating patterns.
-
Applies Alert Preferences and Call Types to control who gets alerted and how.
Key areas on the page
-
Default Schedules section with Fallback and Recurring.
-
Add Schedule button to create one-time entries.
-
Calendar view with hover details and double-click to edit.
-
Table view with columns such as From Date Time, To Date Time, Name, Phone, Tags, Alert Preference.
-
Upload and Download icons to manage schedules with Excel.
Tips and good practices
-
Keep at least one Fallback Schedule active for safety.
-
Use Recurring Schedules for stable patterns like weekends and weekdays.
-
Review coverage in Calendar view to spot gaps.
-
Use Table view to filter and bulk check details.
Switch Between Calendar and Table Views - Admin Panel
Purpose: Show how to see on-call coverage either on a calendar grid or in a sortable table.
Steps
-
Open On-Call Schedule.
-
Select Calendar to view a monthly grid.
-
Hover any entry to see who is on call, their phone, call type, and alert group.
-
Double-click an entry to open it for editing.
-
-
Select Table to view the same entries in rows with key columns.
When to use each view
-
Calendar view for visual coverage and gaps.
-
Table view for sorting, scanning, and quick edits.
Tips and good practices
-
Use the today shortcut to return to the current month.
-
Use the month selector to jump forward or back.
-
In Calendar view, scan for empty cells to find gaps.
Adding On-Call Schedule - Admin Panel
Purpose: Guide a scheduler to add a single on-call entry for a specific period.
Steps
-
Open On-Call Schedule and select the correct organization if you use more than one.
-
Select Add Schedule.
-
Enter From Date Time and To Date Time.
-
Select Primary On Call Doctor or the appropriate contact.
-
Choose Alert Preferences (the protocol that defines how alerts are sent).
-
Choose Select Call Type (the call categories the entry will handle).
-
Select Save.
Notes
-
The entry appears in both Calendar and Table views.
-
If times overlap with another entry for the same call type, the system will follow your escalation design. Keep overlaps intentional.
Tips and good practices
-
Use precise start and end times.
-
Assign the correct call types so calls route as expected.
-
Keep contact information up to date.
Edit or Delete an On-Call Schedule Entry - Admin panel
Purpose: Explain how to adjust an existing schedule.
Edit steps
-
In Calendar view, double-click the entry.
In Table view, select the edit icon for the row.
-
Update date, time, assignee, call types, or alert preference.
-
Select Save.
Delete steps
-
In Table view, select the delete icon for the row.
-
Confirm the deletion.
Tips and good practices
-
After edits, scan Calendar view to confirm there are no gaps.
-
Avoid accidental overlaps across different call types unless you plan a shared rotation.
Configure the Fallback On-call Schedule - Admin Panel
Purpose: Set a default contact who receives alerts when no other schedule matches.
How it works
If a call arrives and there is no matching on-call entry for that time and call type, Phone Copilot sends the alert to the contact defined in the Fallback Schedule.
Steps
-
Open Default Schedules.
-
In Fallback Schedule, select edit if present, or Add to create one.
-
Set a broad From Date Time and To Date Time period that covers your operating horizon.
-
Select Send Alert To contact.
-
Choose the Alert Preferences to define the alert protocol.
-
Select Save Schedule.
Tips and good practices
-
Keep the Fallback window long and continuous.
-
Use an on-call distribution or a responsible lead as the fallback contact.
-
Review Alert Preferences so the fallback person cannot miss an urgent call.
Create a Recurring On-call Schedule - Admin Panel
Purpose: Automate repeating coverage such as weekdays or weekends.
Steps
-
Open Default Schedules and select Recurring Schedule.
-
Select From Date and To Date to define the period where the pattern applies.
-
Enter From Time and To Time for each day the pattern runs.
-
Set Repetition (Daily, Weekly pattern, or similar options shown in the list).
-
Choose Send Alert To and Alert Preferences.
-
Select Select Call Type to target the right categories.
-
Select Save Recurring Schedule.
Examples
-
Weekdays 09:00 to 17:00 covered by Team A.
-
Weekends 09:00 to 17:00 covered by Team B.
-
Nights 17:00 to 09:00 covered by Hospitalist rotation.
Tips and good practices
-
Use multiple recurring entries to model different day parts.
-
Keep the date range aligned with staffing rosters.
-
Review the Calendar to confirm the recurring pattern fills all required days.
Choosing Call Types for On-call Schedule - Admin Panel
Purpose: Explain how call types control which calls a schedule handles.
What call types represent
A call type is a group that reflects the source and urgency of the call. Typical groups include but not limited to:
-
After-hours office routine
-
After-hours office urgent
-
Hospital routine consults
-
Hospital urgent consults
- All office
- All hospital
- All
Steps
-
When adding or editing a schedule, open Select Call Type.
-
Pick one or more groups that the assignee should handle.
-
Save the schedule.
Tips and good practices
-
Keep routine and urgent coverage distinct when the teams differ.
-
If one person covers all after-hours calls, select the group that represents all after-hours traffic as available in your list.
-
Review call type selections whenever your practice rules change.
Set Alert Preferences (Alert Group) on a On-call Schedule - Admin Panel
Purpose: Explain what the Alert Preferences field does during scheduling.
What it controls
Alert Preferences define the protocol that Phone Copilot uses to notify the on-call person. A protocol can include up to three steps and can mix email, text, and phone calls with specific wait times and backups. The actual protocols are created and maintained in Alert Groups. The schedule simply references one of those protocols.
Steps
-
When adding or editing a schedule, open Alert Preferences.
-
Choose the protocol name that matches your escalation policy.
-
Save.
Example protocol idea
-
Step 1: send text immediately.
-
Step 2: if unresolved after 15 minutes, place an automated call.
-
Step 3: if still unresolved, alert a backup contact.
Tips and good practices
-
Keep names of alert protocols clear and short.
-
Test new protocols during a low-risk period.
-
Use different protocols for routine vs urgent call types.
Import and Export On-call Schedules with Excel - Admin Panel
Purpose: Show how to manage schedules in bulk with a spreadsheet.
Export steps
-
Open On-Call Schedule.
-
Select the Download icon near the Calendar and Table view buttons to export the current schedule to Excel.
Import steps
-
Download the template first to confirm the required column headers.
-
Update entries in Excel.
-
Return to On-Call Schedule.
-
Select the Upload icon to import your file.
Tips and good practices
-
Keep date and time formats exactly as shown in the template.
-
Validate phone numbers and contact names before import.
-
Import during low call volume to reduce risk.
Verify On-call Coverage Using Calendar and Table View - Admin Panel
Purpose: Provide a quick checklist to ensure every after-hours call is routed.
Steps
-
In Calendar view, scan each day and night band for entries. Hover items to confirm the right person, call type, and alert group.
-
In Table view, sort by From Date Time and Call Type to look for missing periods.
-
Confirm that Fallback Schedule is present and active.
-
If you find a gap, create a one-time schedule or adjust a recurring schedule.
-
After changes, refresh the view and recheck.
Tips and good practices
-
Review the next four weeks each Friday.
-
Keep a visible checklist of required call types for your practice.
-
Use recurring entries to prevent common gaps such as weekends and nights.
Alert Groups in SimboDIYAS: Overview - Admin Panel
Purpose: Explain what an Alert Group is, how alerts flow during after-hours, and how to view Alert Groups in the Phone Copilot admin menu.
What is an Alert Group
An Alert Group is a reusable alerting protocol or alerting preference that tells Phone Copilot who to notify, when to notify, and how to notify during after-hours on-call requests. Each Alert Group can contain one or more alert steps. Each step defines:
-
Interval (minutes): How long Phone Copilot waits before the next step if no one has handled the request.
-
Who: The on-call assignee for that step. Phone Copilot supports three roles: Primary, Backup 1, and Backup 2.
-
Mode: How notification is sent. Supported modes include Text, Call, and Email.
You select an Alert Group when you set up an on-call schedule. This keeps your escalation logic consistent across schedules.
Alert Types
When you create an Alert Group, you choose one of these types to scope when the group applies:
-
Doctor-based alert: Targets a specific doctor.
-
Call-type based alert: Targets a specific call category such as urgent.
-
Custom alert: Free-form name for any internal policy you want to use.
How alert steps work
-
The first step runs at 0 minutes from the time Phone Copilot receives the on-call request.
-
If the request is not resolved within the step’s interval, the next step runs.
-
Steps continue until someone picks up the request or the sequence ends.
Example flow: Text the Primary at 0 minutes. If unresolved after 15 minutes, place a Call to the Primary. If still unresolved, escalate to Backup 1, and so on.
Where to view Alert Groups
-
Sign in to Phone Copilot as an administrator.
-
Open Admin in the top bar.
-
In the left panel, expand On-call Schedule Management.
-
Select Alert Groups.
-
You will see each group with its steps listed by Interval (minutes), Who, and Mode. Use the page controls to review or open a group.
When Alert Groups are used
-
During after-hours or any schedule where you attach an Alert Group.
-
Any time Phone Copilot needs to notify the on-call team based on your policy.
Tips and good practices
-
Keep the first step at 0 minutes to avoid delays for urgent requests.
-
Use clear Custom names so schedulers can pick the right policy quickly.
-
Prefer short intervals between early steps, and longer intervals later.
-
Always include a final escalation to Backup 2 to reduce missed calls.
-
Review groups after any staffing changes to keep Primary, Backup 1, and Backup 2 accurate.
-
If Email is part of your workflow, include it as an early heads-up and follow with Call for escalation.
Create or Edit an Alert Group for After-Hours On-Call Alerts - Admin Panel
Purpose: Provide step-by-step instructions to add a new Alert Group or edit an existing one, and explain each field.
Before you start
-
Confirm that your on-call providers are assigned as Primary, Backup 1, and Backup 2 in your on-call schedule.
-
Decide the alert type you need: Doctor-based, Call-type based, or Custom.
Add a new Alert Group
-
Go to Admin.
-
Open On-call Schedule Management in the left panel.
-
Select Alert Groups.
-
Select Add to open the Alert Group form.
-
Select Alert Type
-
Doctor-based alert: Choose the doctor.
-
Call-type based alert: Choose the call type or tag such as urgent.
-
Custom alert: Enter a clear name for the policy.
-
-
Build your alert steps:
-
For Alert 1, set Interval (minutes). Use 0 for immediate notification.
-
Choose Mode: Text, Call, or Email.
-
Under On Call Doctors, select who receives this step: Primary, Backup 1, or Backup 2.
-
Select the plus icon to add more steps. Repeat interval, mode, and who for each step.
-
Use increasing intervals to create an escalation path.
-
-
Select Save. Your new group appears in the list and is ready to attach to on-call schedules.
Edit an existing Alert Group
-
Go to Admin → On-call Schedule Management → Alert Groups.
-
Open the group you want to change.
-
Update the Alert Type settings if needed.
-
Adjust steps: change Interval, Mode, or Who. Use the plus icon to add steps. Remove any step you no longer need.
-
Select Save to apply the changes.
Use the Alert Group in an on-call schedule
-
Open Admin → On-call Schedule Management → On Call Schedule.
-
Create or edit the schedule for after-hours.
-
In the schedule setup, choose the Alert Group you created.
-
Save the schedule.
Input forms reference
-
Select Alert Type: Controls when the group applies.
-
Interval (minutes): Delay before moving to the next step if unresolved.
-
Mode: Delivery channel used for the step.
-
On Call Doctors: The target role for the step. SimboConnect supports Primary, Backup 1, and Backup 2.
Tips and good practices
-
Start with a simple two-step pattern: 0 min Text to Primary, then 15 min Call to Primary. Add further steps only if needed.
-
Keep intervals realistic. Typical patterns are 0, 10–15, 30 minutes.
-
Use Call for escalations where acknowledgement is critical.
-
Avoid duplicate steps that notify the same person in the same way without added value.
-
Review and test after saving. Place a test call during a low-risk window to confirm delivery paths.
-
Document the meaning of each Custom group name in your internal runbook so the team picks correctly during scheduling.
Understanding Vacation and Temporary Overrides - Admin Panel
Purpose: Explain what a Vacation or Temporary Override is in Phone Copilot, why it is useful, and where to find it in the Admin area.
What is a Vacation or Temporary Override
A Vacation or Temporary Override lets you replace a scheduled on-call doctor with another doctor for a limited time window. It is a quick way to handle unplanned time off, short leaves, or one-time swaps without changing the main on-call schedule.
-
You set a From date and time and a To date and time.
-
You choose the Existing On Call Doctor to be replaced.
-
You choose the Replacement On Call Doctor who will cover during that period.
During the selected window, Phone Copilot treats the replacement doctor as the on-call doctor. Outside that window, the original schedule remains unchanged.
When to use it
-
A doctor calls in sick or takes an urgent personal day.
-
A one-off shift trade is needed for a few hours or days.
-
You want a fast change that does not modify the base schedule for the month.
Where to find it
-
Sign in to Phone Copilot Admin.
-
Open Admin.
-
Go to On-call Schedule Management.
-
Select Vacation/Temporary Changes.
What you will see on the page
The page shows a table of overrides that are active or upcoming from the current time. Typical columns include:
-
From DateTime
-
To DateTime
-
On Call Doctor
-
Replacement On Call Doctor
Actions available per row:
-
Edit to change dates or doctors.
-
Delete to remove an override.
There is also an Add button to create a new override.
Permissions
Only users with schedule administration access can add, edit, or delete overrides.
Tips and good practices
-
Use overrides for short or unexpected changes. Use the main schedule for long term or recurring updates.
-
Keep time windows tight to the actual absence. This reduces confusion for the front office.
-
Avoid overlapping overrides for the same doctor and time window.
-
Review the list regularly to make sure expired overrides are cleaned up.
-
Confirm that the replacement doctor is enabled as an on-call provider in your organization settings.
Manage Vacation and Temporary Overrides: Add, Edit, Delete, and View - Admin Panel
Purpose: Provide clear steps to add, edit, delete, and view Vacation or Temporary Overrides in SimboConnect.
Before you start
-
Make sure both the original and replacement doctors are added as on-call providers in SimboConnect.
-
Know the exact start and end date and time for the coverage window.
Add a new override
-
Go to Admin → On-call Schedule Management → Vacation/Temporary Changes.
-
Select Add.
-
In the dialog:
-
Set From date and time.
-
Set To date and time.
-
Select the Existing On Call Doctor to be replaced.
-
Select the Replacement On Call Doctor who will cover.
-
-
Select Save.
Result: The override appears in the list and will take effect for the selected window.
Edit an existing override
-
Go to Vacation/Temporary Changes.
-
Find the override in the list and select Edit.
-
Update the From, To, Existing On Call Doctor, or Replacement On Call Doctor as needed.
-
Select Save.
Result: The system updates the override with the new details.
Delete an override
-
Go to Vacation/Temporary Changes.
-
Find the override to remove and select Delete.
-
Confirm the deletion.
Result: The override is removed and the base schedule applies for that time period.
View active and upcoming overrides
-
Use the Vacation/Temporary Changes list to see overrides that are active now or scheduled to start in the future.
-
Check the From and To columns to verify coverage windows.
-
Use Edit to correct any wrong dates or doctor selections.
Troubleshooting
-
Replacement not shown: Confirm the provider is added as an on-call provider and is active.
-
Times look off: Confirm the correct date and time were selected for both From and To.
-
Coverage gap: Create an additional override for any remaining hours if the absence spans multiple windows.
Tips and good practices
-
Double-check From and To before saving. A wrong time can create gaps or overlaps.
-
Keep override windows as short as possible to reflect the actual absence.
-
If a leave becomes long term, update the main on-call schedule instead of stacking many overrides.
-
Communicate the change to the front office so that call routing expectations are clear.
-
After the absence, review the list and remove unneeded future overrides to keep the page clean.
Access Analytics in SimboDIYAS - Admin Panel
Purpose: Help you reach the analytics reports for phone operations in Phone Copilot.
Where to find this
-
Sign in to Phone Copilot.
-
Open Admin.
-
Under Analytics, choose one of the reports:
-
Call Volume
-
Call Details
-
Customer Journey
-
Date range
-
Use Select Duration in the top right to pick a period.
-
Common choices include Last 30 Days and Last 60 Days.
What you can learn
-
How many calls you get and when you get them.
-
Why people call and how your team handles those calls.
-
How calls flow across transfers, pickups, and misses.
Tips and good practices
-
Start with a full month to see patterns.
-
After that, narrow the period to the last week to confirm recent changes.
-
Use the same period when you compare two reports.
Call Volume Report: Overview - Admin Panel
Purpose: Show total volume trends so you can plan staffing and office hours.
What is in this report
-
Weekday Averages: Average number of calls per weekday.
-
Hourly Averages: Average number of calls by hour of day.
-
Daily Call Volume: Count of calls on each day in the selected period.
How to use it
-
Set the Select Duration.
-
Review Weekday Averages to spot your busiest days.
-
Review Hourly Averages to see peak hours.
-
Look at Daily Call Volume to find spikes or dips on specific dates.
Questions this report answers
-
Which day needs extra coverage?
-
What hours need more agents on phones?
-
Did a campaign or clinic event change call volume on certain dates?
Tips and good practices
-
Align break times away from peak hours.
-
If one weekday is always light, use it for training.
-
Check the daily trend after any schedule or message change.
Call Volume: Weekday Averages - Admin Panel
Purpose: Understand which weekdays receive more or fewer calls.
Reading the panel
-
Each bar shows the average number of calls for that weekday in the selected period.
-
Use it to compare Monday to Tuesday, and so on.
Actions to take
-
Increase staffing on the busiest days.
-
Shorten voicemail hold times on peak days.
-
Plan callbacks and admin tasks on lighter days.
Tips and good practices
-
Recheck after holidays because patterns can shift.
-
If one weekday is unexpectedly high, review marketing or reminder schedules sent the day before.
Call Volume: Hourly Averages - Admin Panel
Purpose: Identify peak hours during the day.
Reading the panel
-
Bars show the average calls per hour across the selected days.
-
Early morning and mid afternoon often have different patterns. Your data will show the exact hours.
Actions to take
-
Adjust opening greetings and queue rules during peak hours.
-
Stagger lunches and breaks so coverage remains steady.
-
Schedule outbound tasks in off-peak hours.
Tips and good practices
-
If a single hour is a bottleneck, consider call back offers or smart routing rules.
Call Volume: Daily Call Volume - Admin Panel
Purpose: Track exact call counts for each day in the selected period.
Reading the panel
-
Each day shows the total number of calls.
-
Use it to find sudden jumps or drops.
Actions to take
-
Investigate very low days for possible technical issues or holiday closures.
-
Investigate very high days for campaign impact or staffing needs.
-
Share findings with scheduling leads.
Tips and good practices
-
Pair this with the Call Details report to learn reasons for any spike.
-
Keep a small calendar of events next to the chart to explain patterns.
Call Details Report: Overview - Admin Panel
Purpose: Show what callers need, who handled calls, and how fast requests were closed.
What is inside
-
Call Bifurcation: Reasons for calls.
-
Call Assignments: Number of calls assigned to each user. NA means not assigned to a single user and handled by the team.
-
Call Closure Time: Time your team took to close requests.
-
Call Closers or Closed by: Who closed the calls.
How to use it
-
Set the Select Duration.
-
Start with Call Bifurcation to see the top reasons.
-
Check Call Assignments to balance workloads.
-
Review Call Closure Time to find process delays.
-
Use Call Closers to recognize contributors and coach where needed.
Tips and good practices
-
If one reason grows, update message templates and knowledge notes.
-
If many calls are NA, review routing and ownership rules.
-
Celebrate fast closure and share the steps that worked.
Call Details: Call Bifurcation - Admin Panel
Purpose: Explain why people are calling your practice.
Reading the panel
-
Each category shows its share of total calls in the period.
-
Examples include refills, records, condition related questions, appointments, and other reasons defined for your practice.
Actions to take
-
Prepare scripts and workflows for the top reasons.
-
Update your IVR greeting to direct common requests to the right team.
-
Add self-service steps where appropriate.
Tips and good practices
-
Review this monthly to keep scripts current.
-
If a low-value category is high, look for a self-service option to reduce agent effort.
Call Details: Call Assignments - Admin Panel
Purpose: Show how many calls each user is assigned.
Reading the panel
-
The table lists users and the number of calls assigned to each.
-
NA means calls not assigned to one person and handled by all.
Actions to take
-
Balance workload across the team.
-
Check if key queues route to the right owners.
-
Use the data for fair scheduling.
Tips and good practices
-
Large NA values can hide ownership gaps. Review rules and shift notes.
-
Rotate complex categories across trained users to reduce burnout.
Call Details: Call Closure Time / SLA - Admin Panel
Purpose: Measure how long it takes to close a caller’s request.
Reading the panel
-
Buckets show counts and percentages for closure times such as 0–10 minutes, 10–30 minutes, 30–60 minutes, 1–3 hours, 3–8 hours, 8–24 hours, and more than 1 day.
Actions to take
-
Focus on the largest slow bucket first.
-
Create checklists for repeat requests to speed up steps.
-
Escalate items that often cross 24 hours.
Tips and good practices
Call Details: Call Closed By (Call Closers) - Admin Panel
Purpose: Identify who is closing calls and at what share.
Reading the panel
-
The chart shows the distribution of closed calls by closer.
-
Use it to recognize good performance and to find training needs.
Actions to take
-
Pair high closure share with quality checks.
-
If a user closes many calls outside working hours, review workload balance.
-
Use the results in coaching sessions.
Tips and good practices
-
Cross-check with Call Closure Time. Fast and accurate closure is the goal.
-
Share winning call notes and templates with the whole team.
Customer Journey Report: Overview - Admin Panel
Purpose: Show how calls flow from start to finish, including transfers, pickups, misses, and handle time.
What you will see
-
Total calls split into Transferred and Not Transferred.
-
For transferred calls, destination numbers and their outcomes.
-
For each branch, counts of picked up and not answered calls.
-
Minimum, maximum, and average talk times at each branch.
How to use it
-
Set the Select Duration.
-
Look at the first split to see how many calls are transferred.
-
Follow the branches to see which destinations pick up and how fast.
-
Review talk times to understand effort on each path.
Questions this report answers
-
Are transfers too frequent for certain reasons?
-
Which numbers or teams miss more calls?
-
Where do patients spend the most time on the phone?
Tips and good practices
-
If a destination has slow pickup, adjust staffing or routing.
-
Reduce transfers by giving the first agent the tools to resolve common requests.
-
Share the top two slow paths in weekly huddles.
Customer Journey: Transfers, Pickup, Missed Calls, and Handle Time - Admin Panel
Purpose: Turn journey insights into concrete actions that reduce missed calls and shorten time to help.
Steps to improve
-
Lower unnecessary transfers
-
Map the top transfer reasons to better screen prompts or knowledge articles.
-
-
Increase pickup rate
-
Check hours with low pickup in Hourly Averages and add coverage.
-
-
Shorten handle time
-
Standardize call notes and templates for the top reasons from Call Bifurcation.
-
-
Protect high value paths
-
If one branch serves urgent needs, make it a priority route with clear ownership.
-
What to monitor
-
Transfer rate by department.
-
Pickup rate by destination number or team.
-
Average handle time before and after changes.
Tips and good practices
-
Pilot one change at a time and measure for two weeks.
-
Share simple runbooks for the most common three call reasons.
-
Close the loop by checking Daily Call Volume to see if changes shifted demand.
Analytics Glossary - Admin Panel
Purpose: Provide clear meanings for terms used in SimboConnect analytics.
Terms
-
Call Volume: Number of calls received in a period.
-
Weekday Average: Average calls for a weekday across the selected period.
-
Hourly Average: Average calls for a specific hour of day across the selected period.
-
Daily Call Volume: Total calls on each calendar day.
-
Call Bifurcation: Distribution of call reasons.
-
Call Assignment: Number of calls assigned to a user.
-
NA: Calls not assigned to a single user and handled by the team.
-
Call Closure Time: Time from opening a request to closing it.
-
Call Closer: The user who completed and closed the request.
-
Transferred: Calls transferred by Copilot to one number or team.
-
Picked Up: Calls answered by a destination.
-
Not Answered: Calls that were not picked up.
-
Handle Time: Time spent speaking with the caller during a call.
Tips and good practices
-
Use the same terms in team meetings and training.
-
If your practice uses custom reason names, keep a short index so everyone reads charts the same way.
Operational Playbook: Turning Analytics Into Action - Admin Panel
Purpose: Give you a simple routine to review analytics and improve service every week.
Weekly rhythm
-
Monday: Check Daily Call Volume for last week. Note spikes.
-
Tuesday: Review Weekday and Hourly Averages and adjust schedules.
-
Wednesday: Review Call Bifurcation and update scripts or FAQs.
-
Thursday: Check Call Closure Time and remove process blockers.
-
Friday: Review Customer Journey and plan one improvement for transfers or pickup.
Simple checklist
-
Do we know our two busiest hours?
-
Do we know the top three call reasons?
-
Are ownership rules clear, with low NA?
-
Are most requests closed within the target time?
Tips and good practices
-
Keep changes small and measurable.
-
Share one slide or note with the team each week that shows the metric and the action.
-
Celebrate improvements and keep a log of what worked.
User Roles Dashboard
Purpose
Explain what each Phone Copilot user role can access, when to use each role, and how to choose the correct role when creating a new user.
Overview
It is an AI Phone Copilot for front office teams. Users sign in to a dashboard where access is controlled by roles. There are three roles:
-
Admin
-
Front Desk
-
Staff
Each role controls what the user can see and do in the product.
Role Comparison at a Glance
|
Capability |
Admin |
Front Desk |
Staff |
|---|---|---|---|
|
View all phone calls in the Call Work List |
Yes |
Yes |
No (only assigned) |
|
View SMS/text messages |
Yes, all |
Yes, all |
No (only assigned) |
|
See resolved calls list |
Yes |
Yes |
Yes |
|
Change organization settings |
Yes |
No |
No |
|
Configure Co-pilot settings and workflows |
Yes |
No |
No |
|
Manage on-call schedules |
Yes |
No |
No |
|
Access analytics and reporting |
Yes |
No |
No |
In this guide, “calls” includes both phone calls and SMS text conversations.
Role Details
Admin
Best for: Practice owners, operations leaders, and trusted IT leads.
What they can see:
Everything. All calls, all text messages, all resolved calls, and the full Admin portal.
What they can do from the Admin portal:
-
Change organization settings
-
Configure Co-pilot settings
-
Create and update workflows
-
Manage on-call schedules
-
Access analytics and reporting
-
Perform other administrative tasks
When to assign:
Assign Admin only to a small group that must control settings, compliance, and reporting across the entire organization.
Front Desk
Best for: Receptionists and front office coordinators who handle day-to-day communications.
What they can see:
-
Call Work List with every call, whether assigned to them, assigned to someone else, or unassigned
-
All text messages
-
Resolved calls list
What they can do:
Work through inbound and outbound tasks, triage unassigned items, and keep the queue clean. They do not have access to Admin portal features.
When to assign:
Assign Front Desk to team members responsible for monitoring all patient communications and distributing work.
Staff
Best for: Individual providers and team members who should only see their own workload.
What they can see:
-
Only calls and SMS that are assigned to them
-
Resolved calls list
What they can do:
Respond to and close out their assigned items. They do not see items assigned to others and do not have access to Admin features.
When to assign:
Assign Staff to clinicians and specialists who should focus on their own tasks without exposure to the full queue.
How to Choose the Right Role When Creating a User
Use this quick decision guide during user creation:
-
Does this person need to change settings or view organization-wide reports?
-
Yes → Admin
-
No → Go to step 2
-
-
Should this person see and manage the entire communications queue for the practice?
-
Yes → Front Desk
-
No → Go to step 3
-
-
Should this person only see items assigned to them?
-
Yes → Staff
-
No → Reassess responsibilities. Most non-admin users should be Front Desk or Staff.
-
Typical Assignments
-
Practice Manager or Owner: Admin
-
Lead Receptionist: Front Desk
-
Reception Team Member: Front Desk
-
Doctor, Nurse, or Provider: Staff
-
Contractor or Temp Provider: Staff
Changing Roles Later
Only an Admin should change a user’s role. If responsibilities change, update the role from the Admin portal in the user management area. Changes take effect on the next login or page refresh.
Security and Privacy Notes
-
Follow least-privilege access. Give the lowest role that still lets the person do the job.
-
Keep Admin access limited and reviewed on a regular schedule.
-
Remove or downgrade access when staff leave a team or change responsibilities.
Tips and Good Practices
-
Start new users as Staff unless they clearly need broader access.
-
Keep the number of Admin users small and documented.
-
Use Front Desk for anyone who must watch and work the full queue throughout the day.
-
Review user roles monthly or during staff changes.
-
Encourage Staff users to close or hand off items quickly so Front Desk can maintain a clean Call Work List.
-
Periodically check the resolved calls list to ensure quality and correct routing.
Get started with SimboDIYAS: Step by Step Registration
Get started with SimboDIYAS
What SimboDIYAS does
SimboDIYAS is an AI powered answering service for medical practices. It helps screen patients, handle after-hours and overflow calls, and route messages to the correct on-call team. You can manage schedules, alerts, and message templates from an admin dashboard.
Website: https://diyas.simboconnect.com
Before you start
-
Use a work email that you can access.
-
Have your practice name and address ready.
-
Have a payment method ready. Card and Cash App Pay are available on checkout.
Step 1. Enter your email to begin
-
Go to the SimboDIYAS website.
-
Enter your work email in the “Enter Email ID to get started” field on the right.
-
Press Next.
Snapshot:
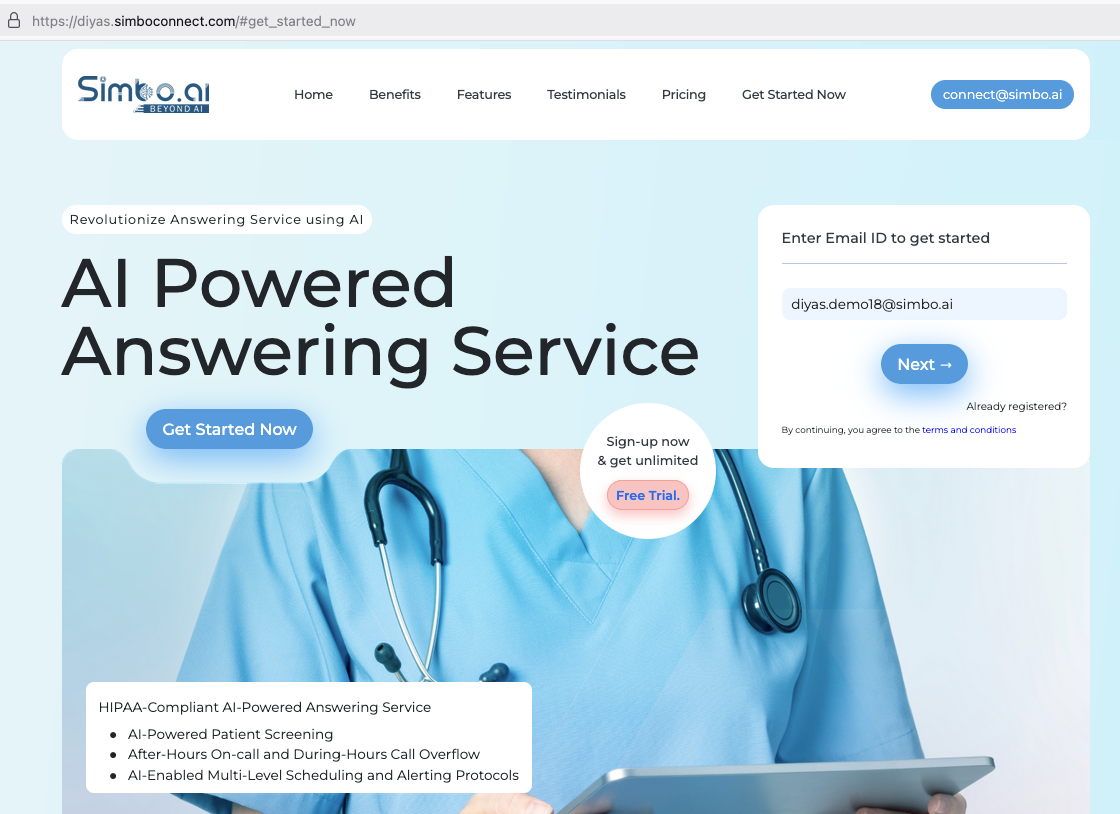
Step 2. Create your administrator account
-
Enter First Name and Last Name.
-
Enter Zip Code and Phone number (xxx-xxx-xxxx).
- The phone number specified preferably be a cell phone which helps sending some critical alerts, if required.
-
Confirm your Email is correct.
-
Create a Password. Minimum length 8, use upper and lower case letters, at least one special character, and a digit.
-
Re-enter the same password.
-
Press Register.
Snapshot:
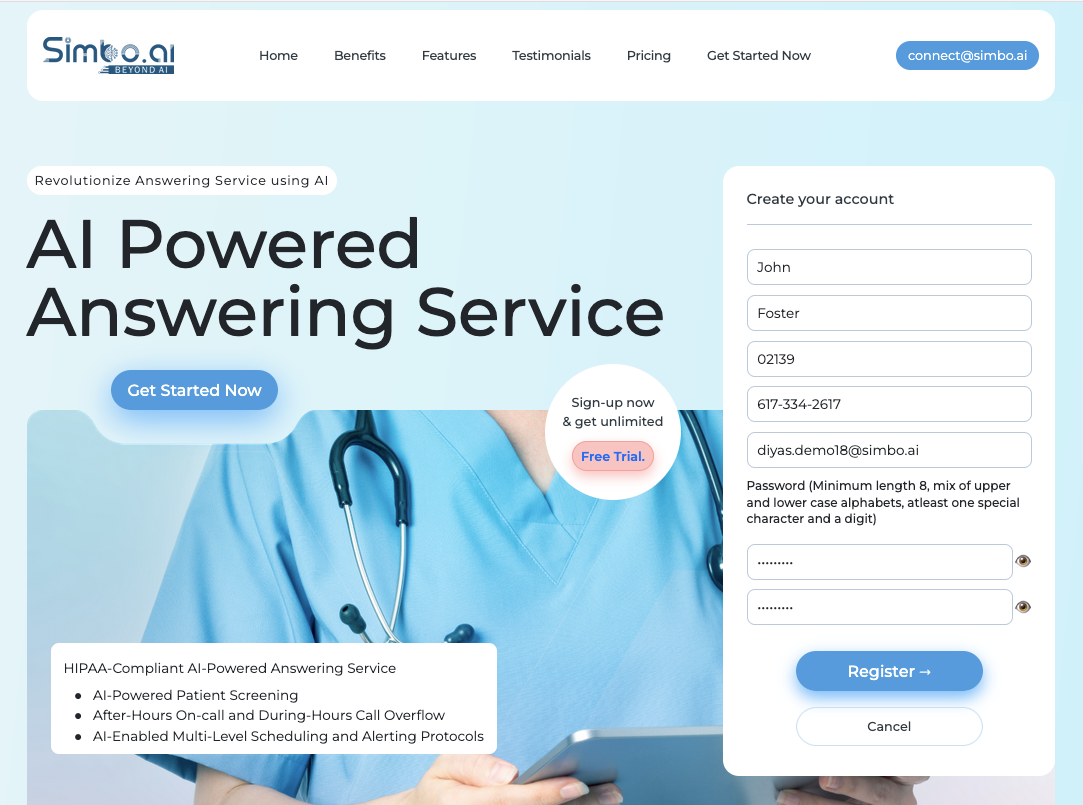
Step 3. Choose a subscription plan
-
Review the available plans. You can pick Basic, Practice Starter, or Practice Premium.
-
Each plan includes a dedicated VoIP phone number and answering workflows. Higher tiers include more calls and extra features.
-
Press Subscribe under the plan that fits your practice.
Snapshot:
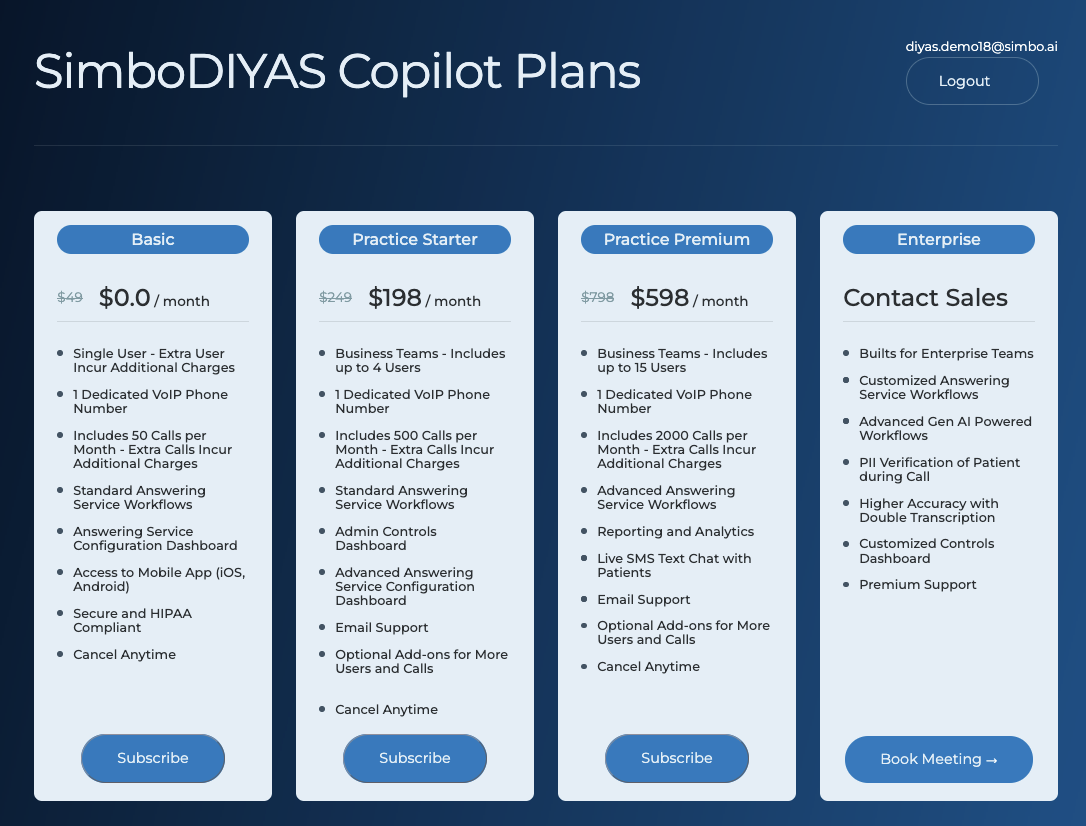
Step 4. Enter payment information
-
On the secure checkout page, confirm your Email.
-
Choose Card or Cash App Pay as your payment method.
-
If you have a promo code, select Add promotion code and apply it.
-
Select Subscribe to complete payment.
Snapshot:
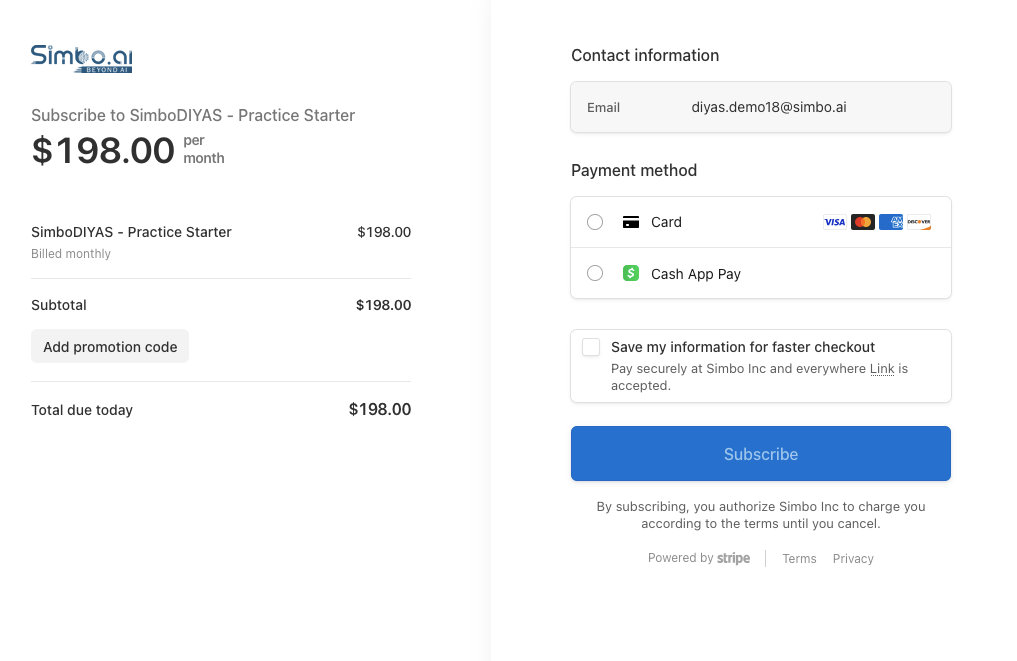
Step 5. Enter practice details
-
Type your Organization Name.
-
Enter Address Line 1, optional Address Line 2, City, and Zip Code.
-
Confirm State and Timezone.
-
Press Next.
Snapshot:
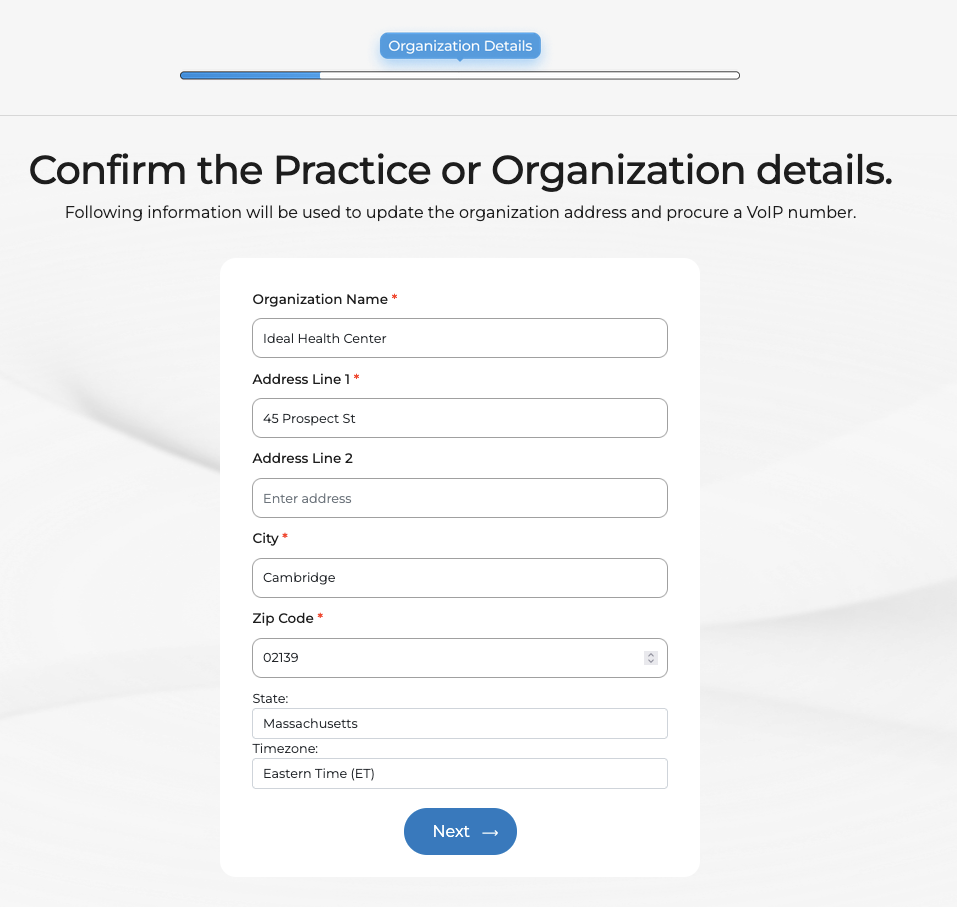
Step 6. Follow the on-boarding screen
-
You will land in the admin dashboard with a setup guide.
-
At the top you will see your dedicated AI Answering Service phone number. Forward your practice calls to this number to start receiving messages.
-
Use On Call Schedule and Alert Groups to set coverage and routing.
-
Review Copilot Settings and Message Templates to customize call handling.
Snapshot:
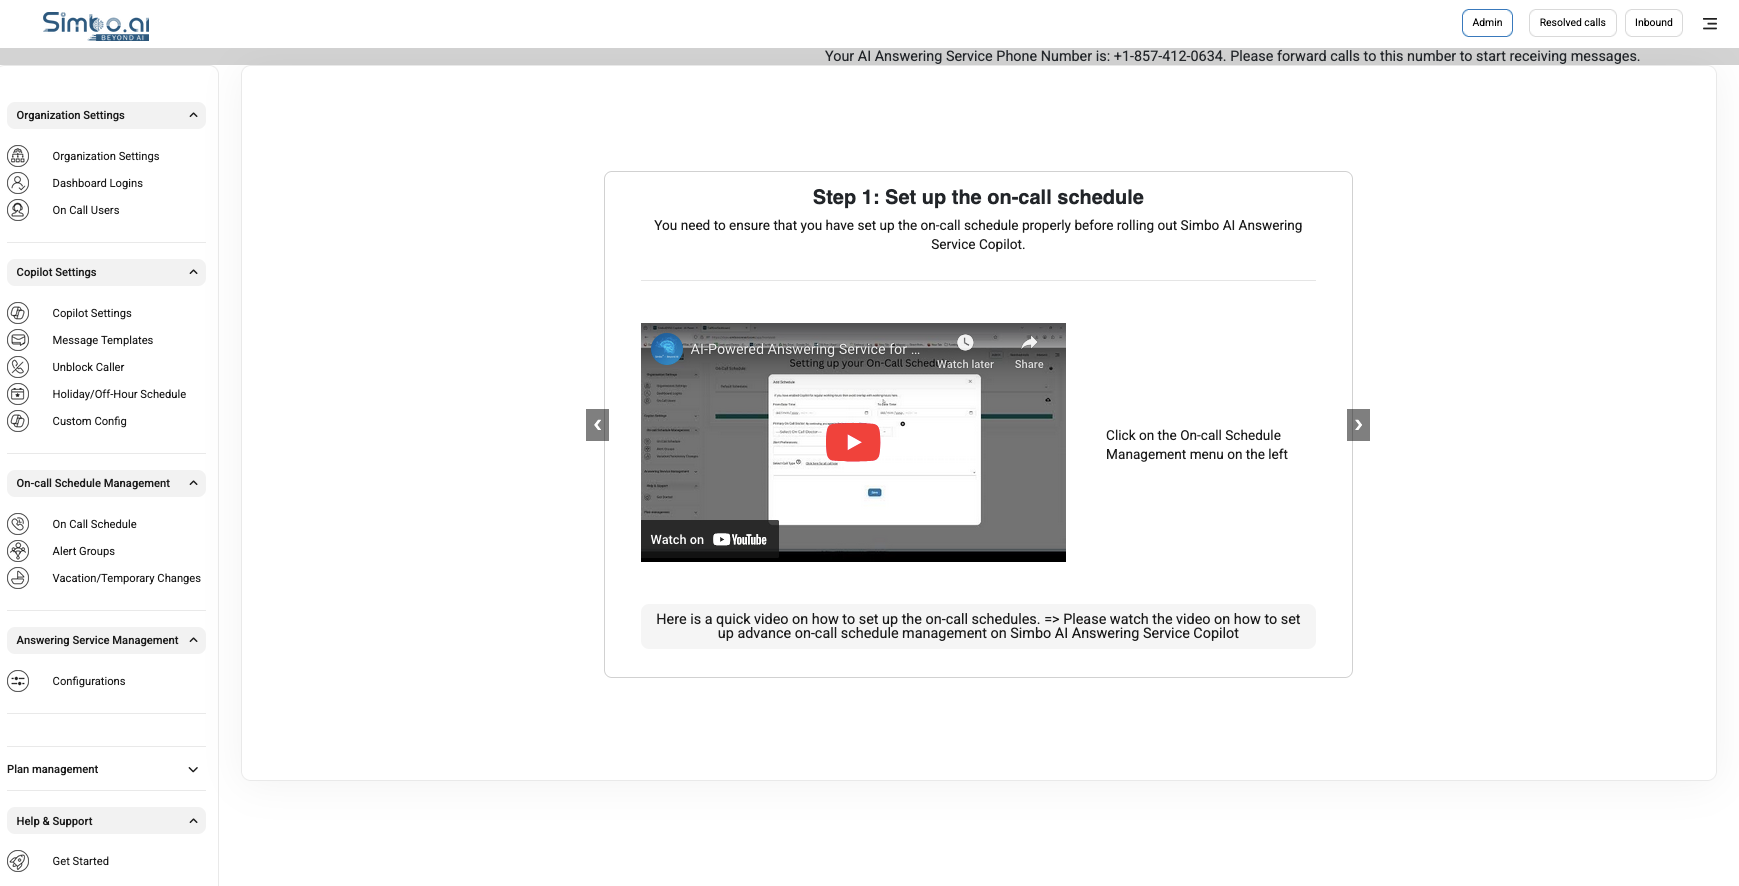
Step 7. Rolling out the AI Answering Service
- Go to Admin -> Copilot Settings and check the "Copilot Number" for the dedicated Copilot Phone Number for your practice.
- Forward your phone calls from your Phone System to this Copilot Phone Number and you are all set!
- Feel free to make some calls to the Copilot Phone Number to check out how it works.
- But before you do that, ensure that you have setup your workflows properly! Details with links given below.
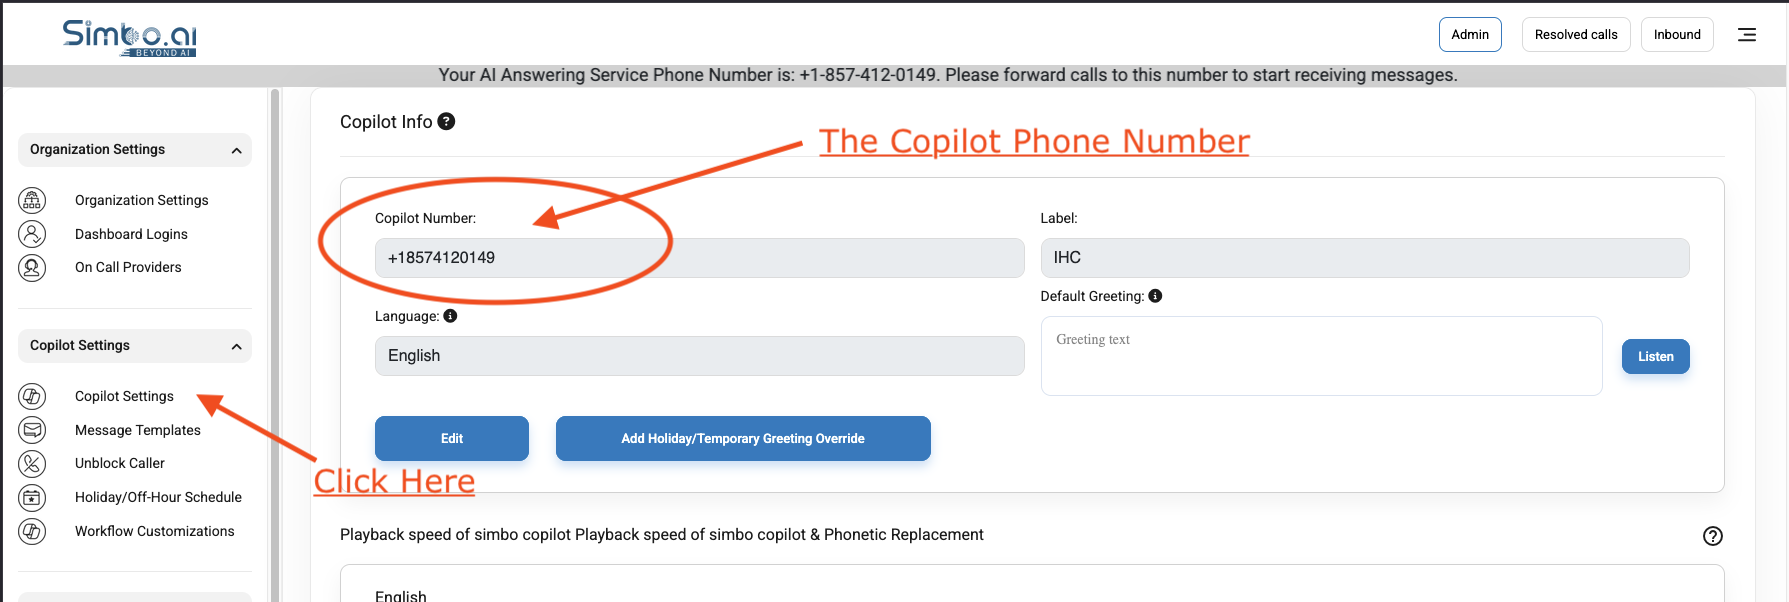
Step 8. On-boarding and workflow configurations
Please see the links below for details on how to configure your Copilot for best performance and your custom workflows. You can update those on your login and press the "Admin" on top-menu.
-
You can checkout complete guide on this page: https://api1.simboconnect.com/helpb/books/simbodiyas-after-hours-on-call-ai-agent
- Customize your workflows: https://api1.simboconnect.com/helpb/search?term=SimboDIYAS+Workflow+Customizations
-
In case you turned on the after-hours on-call workflows, please setup on-call schedule here: https://api1.simboconnect.com/helpb/search?term=on-call
- Add new dashboard logins: https://api1.simboconnect.com/helpb/books/simbodiyas-after-hours-on-call-ai-agent/page/add-a-new-dashboard-user-admin-panel
What happens next
-
Your subscription becomes active after payment.
-
You can finish any remaining on-boarding steps above on your Admin Panel.
-
Keep the admin login safe. You can add team members later from the admin area.
Need help
Email connect-support@simbo.ai from your work email and include your practice name.